May 26-30
We had a lot of fun this week in class. We continued working with the story "The Hungry Caterpillar", where the students got to act out the story and retell their story with their sequence activity. We learned a lot about spiders and even pretended to be a spider for the day and finally our caterpillars arrived!
We had a lot of fun this week in class. We continued working with the story "The Hungry Caterpillar", where the students got to act out the story and retell their story with their sequence activity. We learned a lot about spiders and even pretended to be a spider for the day and finally our caterpillars arrived!
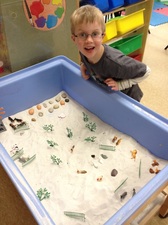
Our caterpillars have finally arrived!!!
We are very excited to have our new friends in the classroom. The students have been working really hard learning the butterfly life cycle and now they can actually observe it. To get the caterpillars set up, I had to first punch 3 holes in each lid. Then I had to mix the food with some water and put it in each container. I tried to put 2-3 caterpillars in each container. This was the hard part because they were so tiny. We are already observing how the caterpillars are getting bigger and it's only been one day. We are going curious to see what they are going to look like on Monday. At the science centre, I have put out a book on the life cycle, a magnify glass (since our friends are so tiny) and a observation sheet. On the sheet they have to write down what day it is (i.e., day 3) and check off it they see a caterpillar, chrysalis or a butterfly. They then have to draw what they see. Each student will be asked to do an observation sheet for each stage of the cycle. I will try and post more pictures.
We are very excited to have our new friends in the classroom. The students have been working really hard learning the butterfly life cycle and now they can actually observe it. To get the caterpillars set up, I had to first punch 3 holes in each lid. Then I had to mix the food with some water and put it in each container. I tried to put 2-3 caterpillars in each container. This was the hard part because they were so tiny. We are already observing how the caterpillars are getting bigger and it's only been one day. We are going curious to see what they are going to look like on Monday. At the science centre, I have put out a book on the life cycle, a magnify glass (since our friends are so tiny) and a observation sheet. On the sheet they have to write down what day it is (i.e., day 3) and check off it they see a caterpillar, chrysalis or a butterfly. They then have to draw what they see. Each student will be asked to do an observation sheet for each stage of the cycle. I will try and post more pictures.


At the alphabet centre this week, the students were asked to do a flip book with the story "The Hungry Caterpillar". They had to cut out the pictures and glue them under the correct day of the week.
Spiders, spiders, spiders
Today, we learned all about spiders. We first did a KWL chart, where I asked the students what they already know about spiders and wrote their answers down on the Smartboard. Then I asked them what they wanted to learn about spiders. We then we read a non-fiction book about spiders and the students were asked to tell me what they learned. Here are some of the things we learned:
- spiders have 8 legs and are not an insect
- spiders catch their food in their web or they chase what they want to eat
- spiders are part of the arachnoid family
- there are many different kinds of spiders
- spiders can have more than 2 eyes
- spiders don't have wings and can't fly
- spiders can live in their web by building a nest
We then made our spider hats. The students had to make the eyes and glue 8 legs. Some spiders had multiple eyes and some were very colourful.
At the end of the day, I had the students say one thing they learned about spiders. I gave the students some yarn at the same time. So, after they told the class what they learned they threw the yarn to another friend. After we all said one thing we learned, it looked like a spider web. It was a fun day!


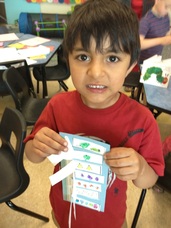
Retelling the story the Hungry Caterpillar
After reading and retelling the story many times this week as a whole group, the students then had a chance to retell the story in small groups. For this activity, the students had to glue the story in order. Once they were finished I punched a hole in the food for them, so that their caterpillar (made out of pipe cleaners) can fit.
As well, we discussed how a story always has a beginning, middle and an end. We used the story the "Hungry Caterpillar" as an example.
Beginning: there was a tiny egg on a leaf and it was night time
Middle: the caterpillar was very hungry and kept eating and eating
End: the caterpillar turned into a beautiful butterfly


May 20-23
We are having a blast learning about the life cycle of a butterfly. I started our butterfly unit by teaching all of the phases of the butterfly's life cycle. We read books, made butterfly crafts, and watched little video's on the life cycle. We even pretended to be a little caterpillar turning into a butterfly. We will be proud owners of caterpillars next week (there was a delay in the order) where the students will actually get to observe the life cycle of a butterfly. Next week, we will be reading Eric Carle's "The Hungry Caterpillar" and will have many activities to go with the book.
We are having a blast learning about the life cycle of a butterfly. I started our butterfly unit by teaching all of the phases of the butterfly's life cycle. We read books, made butterfly crafts, and watched little video's on the life cycle. We even pretended to be a little caterpillar turning into a butterfly. We will be proud owners of caterpillars next week (there was a delay in the order) where the students will actually get to observe the life cycle of a butterfly. Next week, we will be reading Eric Carle's "The Hungry Caterpillar" and will have many activities to go with the book.
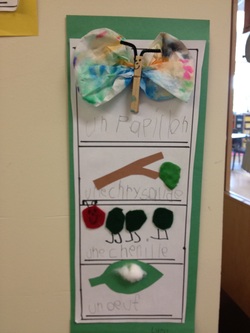
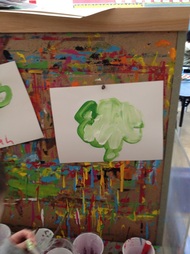
Life cycle of a butterfly
The students have learned that the life cycle of a butterfly is a continuous process. It starts out with:
1. An egg: the butterfly finds a leaf and lays her eggs
2. A caterpillar: when the caterpillar is ready to come out of the egg, she is really hungry. She first eats her egg that she came out of, then the leaf her egg lay on, then she continues until she is full. When the caterpillar gets bigger, she sheds her skin in order to make room for all of the food she is eating. She is ready for the next stage when she can't eat any more.
3. A chrysalis: the caterpillar first finds a branch to hand from (head first) and curls up like the letter J. She builds a cocoon around herself. Then the caterpillar turns into a chrysalis. A chrysalis is either green or gray (clear).
4. A butterfly: after 14 days, the caterpillar has transformed into a beautiful butterfly. When she comes out of her cocoon her wings are very wet and she actually has to wait a couple of hours before she can fly.
For this activity, the students had to create the life cycle of a butterfly. They wrote each stage out first. Then they made a coffee filter butterfly where they had to colour a coffee filter with markers. Then they sprayed their coffee filter with water to let the colours run. They let it dry over night and then added a clothespin for the body. Then then added they added all other stages of the life cycle. They turned out quite nice.
Our bean plants have finally sprouted and are ready to come home!!
The students are so excited to bring their bean plants home today. They have worked so hard at taking care of it and watching it grow. The students were each responsible for planting the seed, watering their plant on a regular basis and writing their observations. They brought home their observations to show you. As you can see, it took 21 days to get to where it is today. At each stage they drew a picture of what it looked like. I have provided a sheet that explains how to plant a bean plant in your garden and how to take care of it. I hope you all enjoy it and that they are very tasty!
The students are so excited to bring their bean plants home today. They have worked so hard at taking care of it and watching it grow. The students were each responsible for planting the seed, watering their plant on a regular basis and writing their observations. They brought home their observations to show you. As you can see, it took 21 days to get to where it is today. At each stage they drew a picture of what it looked like. I have provided a sheet that explains how to plant a bean plant in your garden and how to take care of it. I hope you all enjoy it and that they are very tasty!


Measuring our butterflies
This week, the students were asked to paint a butterfly. They were encouraged to add all parts of an insect (head, thorax, abdomen and 6 legs). Once their butterfly dried, they were asked to cut it out and then measure the wingspan using a variety of manipulatives (pegs, chain links, cubes, sticks). Once they measured their wingspan, they wrote the number and what manipulative they used. You will notice that the words may not be spelled correctly. This is because I wanted to them to sound out the word and write what they heard. This is the first step of learning how to write. Playing with letters and becoming confident is going to be a use success in their learning. I am already seeing some great writing!!!! This is the most exciting part of being a kindergarten teacher!!!
This week, the students were asked to paint a butterfly. They were encouraged to add all parts of an insect (head, thorax, abdomen and 6 legs). Once their butterfly dried, they were asked to cut it out and then measure the wingspan using a variety of manipulatives (pegs, chain links, cubes, sticks). Once they measured their wingspan, they wrote the number and what manipulative they used. You will notice that the words may not be spelled correctly. This is because I wanted to them to sound out the word and write what they heard. This is the first step of learning how to write. Playing with letters and becoming confident is going to be a use success in their learning. I am already seeing some great writing!!!! This is the most exciting part of being a kindergarten teacher!!!

Lady bug letter match
At the alphabet centre this week, the students were asked to match the uppercase and lowercase letters. On the back side of each ladybug was a picture for them to sound out.
At the alphabet centre this week, the students were asked to match the uppercase and lowercase letters. On the back side of each ladybug was a picture for them to sound out.

Bug building
At the construction centre, the students were making caterpillars and butterflies out of our new building toys. They were a provided a template that showed them how to build it. Some students even made their own bugs.
At the construction centre, the students were making caterpillars and butterflies out of our new building toys. They were a provided a template that showed them how to build it. Some students even made their own bugs.
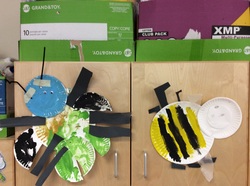
Insect Paper plates
Once of our crafts this week was to create their favourite bug on paper plates. I provided them paper plates, paint, paper, eyes and antennae. They did the rest! All of the insects have a head, thorax, abdomen and 6 legs. Our classroom is looking pretty buggy!!!!
Once of our crafts this week was to create their favourite bug on paper plates. I provided them paper plates, paint, paper, eyes and antennae. They did the rest! All of the insects have a head, thorax, abdomen and 6 legs. Our classroom is looking pretty buggy!!!!
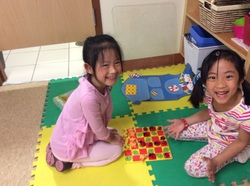
Insect games
I have a few insect games that the students can play with. The one you see here, uses caterpillars and ladybugs instead of the regular chess pieces. On the other side of board, the students can play tic tac toe.
I have a few insect games that the students can play with. The one you see here, uses caterpillars and ladybugs instead of the regular chess pieces. On the other side of board, the students can play tic tac toe.

May 13-17
This week, we continued learning about plants and started learning about insects.
This week, we continued learning about plants and started learning about insects.
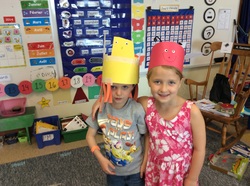
Bug hats
This week, the students created their own bug hats. I provided the art supplies and they used their own creativity.
This week, the students created their own bug hats. I provided the art supplies and they used their own creativity.

Stamping words
At the writing centre this week, the students were asked to stamp out words that pertained to parts of a plant.
At the writing centre this week, the students were asked to stamp out words that pertained to parts of a plant.
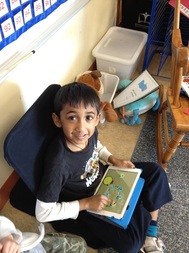
Testing out our new puzzles
Working as a team, these students put together one of our new puzzles. Then they asked me if they could do another one and another one. It is such an accomplishment when they finish one!
Working as a team, these students put together one of our new puzzles. Then they asked me if they could do another one and another one. It is such an accomplishment when they finish one!
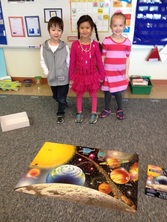
IPAD
I'm very excited to have a new IPAD in the classroom!!! Here you see a student putting together the lifecylce of a plant, a butterlfy, a bird and an apple tree. I can't believe how well the students know how to use an IPAD. I have some catching up to do!!!
I'm very excited to have a new IPAD in the classroom!!! Here you see a student putting together the lifecylce of a plant, a butterlfy, a bird and an apple tree. I can't believe how well the students know how to use an IPAD. I have some catching up to do!!!
A book all about seeds
At the science centre this week, I created a seed book that showed the students a variety of different seeds and I included the packet to show them which plant they came from.
At the science centre this week, I created a seed book that showed the students a variety of different seeds and I included the packet to show them which plant they came from.


Since we were learning about plants, their parts and their function, I wanted to show the students how water actually travels up a plant. I put red and blue dye in water and added celery sticks. I made sure that the celery was very flimsy. The celery sucked the water up very quickly and it turned hard again. The students loved coming in each day seeing that the celery was an even darker colour.


April 28-May 2
This week, we started learning about plants. We discussed how a plant grows, the part of a plant and their function and what a plant needs to survive.
This week, we started learning about plants. We discussed how a plant grows, the part of a plant and their function and what a plant needs to survive.
Planting our beans
After learning about what plants need to survive and the parts of a plant, the children then got to plant their own bean plant yesterday. The steps they followed were as followed:
1. They first put soil in their cup
2. Then made two holes for their seeds
3. They then watered their plant (not too much or the soil will become too damp)
4. Lastly, they put their plant in the
The children will be monitoring the growth of their plants daily. They are going to be responsible for watering it and to make sure it has enough sun.Today, they were asked to draw a picture of what they saw onto an observation sheet. As the plant grows they will be recording their observations. They are looking forward to bringing it home and planting it in their own garden.


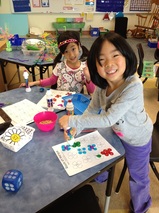
Roll and stamp
At this centre, the children were asked to roll the dice and find the corresponding number on one of the flowers. They then had to stamp the same amount. I don't know what it is about Bingo Dabbers but they absolutely love them!!!
At this centre, the children were asked to roll the dice and find the corresponding number on one of the flowers. They then had to stamp the same amount. I don't know what it is about Bingo Dabbers but they absolutely love them!!!
Recycling
Now that the recycling bins are completed and the children brought in a variety of recycling items, the children had the opportunity to sort the objects on their own. Thank you again to those whom brought in items.
Now that the recycling bins are completed and the children brought in a variety of recycling items, the children had the opportunity to sort the objects on their own. Thank you again to those whom brought in items.
Testing out our new costumes
As more toys come trickling in, I have been putting them out for the children to play with. This week, I put out our new costumes. Some decided to be knights, superheros, little red riding hood, vampires, etc. They were certainly a hit!!!
As more toys come trickling in, I have been putting them out for the children to play with. This week, I put out our new costumes. Some decided to be knights, superheros, little red riding hood, vampires, etc. They were certainly a hit!!!


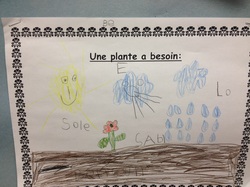
What does a plant need?
For this activity, the children had to draw a picture of what a plant needs to survive. They then were asked to write the words on their own. A plant needs:
1. Sun
2. Water
3. Soil
4. Air
For this activity, the children had to draw a picture of what a plant needs to survive. They then were asked to write the words on their own. A plant needs:
1. Sun
2. Water
3. Soil
4. Air
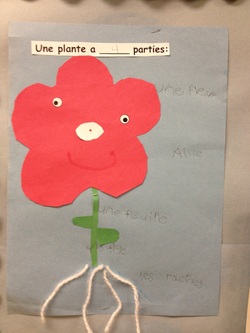
Parts of a plant:
Each part of a plant has a very important function. All plants produce flowers for the same reason: to make seeds so another plant can grow.
1. Root - holds the plant in the ground and absorbs water and nutrients from the soil.
2. Stem - carries the water and nutrients to the rest of the plant. It also helps support it and direct the leaves towards the sunlight for them to produce the food source for the plant.
3. Leaves - make food for the plant
4. Flowers - make the seeds to make new flowers
The children were responsible for making their own flower, stem and leaves. They then added the roots and labeled their plant.
Making bread and butter
To finish off our farm unit, we made some homemade bread and butter. We first discussed the importance of following recipes and what would happen if we didn't follow step by step. The children were split into two groups. One group made the bread, while the other made some butter and then they switched. So they all had the opportunity to do both.
For the butter, the only thing we needed was cream (35%). We filled a container up half way and then all we had to do was shake, shake and shake!!!!!
After about 5-10 minutes of shaking the cream slowly thickened and turned yellow. We then cleaned the butter off with cold water and added a bit of salt. I asked the children if they thought farmers today would make butter by hand or with machines. They said that making butter was hard work, so they thought it would be best for farmers to use machines.
For the bread, the children each had the opportunity to add an ingredient and then stir the ingredients. They each made a dough ball. The bread I had them make had no yeast in it, so it didn't take long to make or cook.
Afterwards, they ate their bread and added a little butter. It was delicious! Thank you again to the parents that helped me out. We couldn't have had done it with out you.


April 22-25
Well this was a fun and exciting week for the students. On Tuesday, we celebrated Earth Day and the students had many opportunities in the classroom to honour this day.
Well this was a fun and exciting week for the students. On Tuesday, we celebrated Earth Day and the students had many opportunities in the classroom to honour this day.
Preparing the Recycling Bins
This week, the students learned about the 3 R's:
Recycle: Many of the things we use every day, like paper bags, soda cans, and milk cartons, are made out of materials that can be recycled. Recycled items are put through a process that makes it possible to create new products out of the materials from the old ones.
Reduce: "Reduce" means using fewer resources in the first place. This is the most effective of the three R's and the place to begin.
Reuse: Instead of throwing things away, try to find ways to use them again! Reusing keeps new resources from being used for a while longer, and old resources from entering the waste stream.
As well, the students learned the different items we can put in the 3 recycling bins:
Black: Paper, newspaper and cardboard
Blue: Metal, plastic, glass
Green: Food, yard waste (grass, leaves, etc.), Kleenex, paper towel
Below you will see the students painting their recycling bins they are going to use next week at the Science centre where they will have opportunity to sort items into the correct bins.


The Green Bin
Since we were learning about the different recycling bins, I thought it would be a cool idea to show the students what happens to food when we put it in the green bin. They were so shocked when I told them that eventually the food can turn to soil (soil we can then use for our own gardens) and it was hard for them to picture, so I decided to let them investigate it. Below you will find 3 compartments. The first one had a YOP container in it, the second a banana peel and the third a piece of paper towel. I then let the students observe each compartment to see what would happen to the items. They were all suited up with gardening gloves, a small shovel and a magnify glass.
Compartment 1:Of course a plastic container doesn't compost but it was a good way to show them that plastic can't decompose.
Compartment 2: It was pretty neat because the only part of the banana that was left was the tip. We had to dig and dig until we found it. The far picture is the tip of the banana that we found.
Compartment 3: This compartment was really stinky and the only thing they found was a small piece of the paper towel. Most of it had already decomposed.
Thank you Mrs. Roberts for letting us use your cool composting kit.


Dairy Farmer Presentation
On Friday, the students were invited to a presentation by the Dairy Farmers of Ontario. They discussed the four food groups, where milk comes from, what food is made of milk and how they milk the cows.
On Friday, the students were invited to a presentation by the Dairy Farmers of Ontario. They discussed the four food groups, where milk comes from, what food is made of milk and how they milk the cows.


Unifix Cube Flowers and Earth
At a free centre this week, the students made flowers and the Earth using Unifix cubes. I provided them with a template and they used their own colours. They then had to count the number of cubes they used (perimeter) and colour in the cubes according to their creation.
At a free centre this week, the students made flowers and the Earth using Unifix cubes. I provided them with a template and they used their own colours. They then had to count the number of cubes they used (perimeter) and colour in the cubes according to their creation.


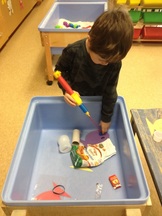
Saving the fish from garbage
At the water centre this week, the students helped the fish get clean water. They had to fish out the garbage to help the water get clean again. They had a lot of fun with this activity. I had put staples in all the fish and garbage to make them magnetic.
At the water centre this week, the students helped the fish get clean water. They had to fish out the garbage to help the water get clean again. They had a lot of fun with this activity. I had put staples in all the fish and garbage to make them magnetic.
What happens to water with garbage in it?
On Monday, I asked the students to put their garbage in this container after they ate snack. I then added water to it and asked the students to tell me what they think will happen to the water if I left the garbage in it. They told me:
- it will turn yucky
- it will be dirty
- it will smell
After only 10 minutes, the water turned brown and had a lot of floating pieces. We then discussed what the fish would think if they swam in water with garbage in it.


Recycled art
At a free centre this week, the students made trees out of recycled materials. They used recycled cardboard for the trunk and branches and they dipped a paper towel roll and a Pepsi bottle in paint for the leaves. They turned out great!
At a free centre this week, the students made trees out of recycled materials. They used recycled cardboard for the trunk and branches and they dipped a paper towel roll and a Pepsi bottle in paint for the leaves. They turned out great!
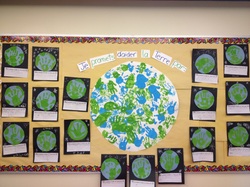
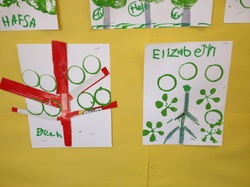
I will help the Earth by:
We first read the book "Je t'aime la Terre". The author talks about lots of easy, smart ideas on how we can all work together to make the Earth feel good - from planting a tree and using both sides of the paper, to saving energy and reusing old things in new ways. I like this book because it tells the kids what happens if we carry out a promise. For example, if we used both sides of the paper, the trees will be happy and the animals in it.
I then asked the students to tell me one promise they would do to help the Earth feel good. They wrote their promise under a globe they made by hand printing their hand. We made a bigger Earth with our hand prints. The morning class did the water and the afternoon class did the land.
April 14-17

At the sand table this week, the students had to dig for eggs and put them in numerical order (from 1-20).
Dans mon oeuf il y a:
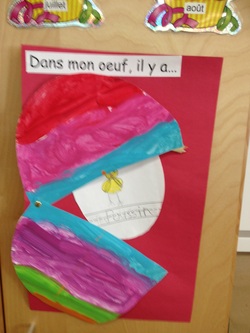
On Monday, I taught the students a new poem about an Easter egg. In the poem, I hid different things inside 3 eggs and they had to guess what was inside. We did this poem for the entire week. I like it because it is very repetitive poem and it's really catchy.
For this activity, they had to do two parts:
1- They had to paint an Easter egg
2- Then they had to cut it out and pick something they would want to hide in their egg. They had to draw a picture and then try and write the word on their own.
Here is the poem:
Dans mon oeuf, il y a un oeuf tout beau, tout bon et tout neuf.
Dans mon oeuf, il y a, il y a....
Dans mon oeuf, il y a, il y a_________________. (they tell you what is inside)
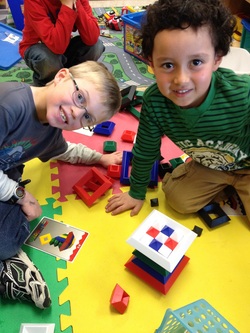
Wedgits
Here are a couple of students testing out our new Wedgits (part of the new toys arriving for the Full Day Kindergarten Program). Wedgits are a type of building toy. They have flashcards to help them build different objects. So far, they are a big hit!!!
Here are a couple of students testing out our new Wedgits (part of the new toys arriving for the Full Day Kindergarten Program). Wedgits are a type of building toy. They have flashcards to help them build different objects. So far, they are a big hit!!!
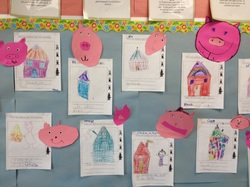
Voici la maison que j'ai construis...
In the story the three little pigs, the wolf was able to blow down the straw house and the stick house but couldn't blow down the brick house. We discussed why the wolf couldn't blow it down and they told me:
- that it was strong
- it was solid
- it was glued
- it was heavy
So, I decided to challenge them a little and have them come up with a house that they thought would be strong. A house that the wolf couldn't blow down. They were asked to draw a picture of the house and try and write the words on their own. They are starting to really understand the writing process. We would clap out each syllable at a time.
Happy Easter!!! Joyeuse Paques!
When the students arrived to class this morning, they noticed that someone had visited the classroom. They found a carrot on my chair that told them that there were clues around the school that would lead them to basket. So, as quietly as we could, we followed the clues. We ended up going to the office, the library, the gym and even Mrs. Beaten's class. What they didn't know was that the clues led us back to our own class. But when they found the basket, it was empty. The clue told them that the eggs were hidden around the classroom.
Once they found their egg, they had to sort the jelly beans according to their colour and then graph the results. They then had to tell me what colour they had the most of and what colour they had the least of. And then of course, they were allowed to eat them!!! That was their favourite part.


April 7-11 - Three Little Pigs FUN
This week, we read the story of the Three Little Pigs in French. I honestly could do folk and fairy tales all year long. It is always amazing to see how much the students enjoy this story, even though they have heard it many times.
This week, we read the story of the Three Little Pigs in French. I honestly could do folk and fairy tales all year long. It is always amazing to see how much the students enjoy this story, even though they have heard it many times.
Three Little Pigs Activities
Below you will find a variety of activities we did this week that went along with the story of the three little pigs:
A) Retelling the story using props: As a whole class, we read the book, acted out the story using props and made a story map many times. I then let the students reenact the story, in small groups, with a variety of different props (i.e., masks, characters on sticks, felt). I encouraged them to work together to sequence the story and to show what happened first, second, third, etc. The students used many repetitive words that the pigs and the wolf used in the story. They did a great job acting it out and of course, it is a story they know very well!!!!
B) Three little pigs emergent reader: In this book, the students had to fill in the missing words and make a picture to go with the text. It is a simple text that is designed to support emergent readers. It will allow the students to reinforce concepts of print such as words are separated by spaces, left to right and top to bottom, written words match spoken words, common sight words, and more. In class, we had many opportunities to practice the story. We read them with me, as a group, on their own and with a partner.
C) Our own houses: At one of the free centres this week, I put out pieces of paper and told the students that we needed 3 houses to go with the story of the three little pigs. They did all the work themselves (I just cut them out for them). The students made the straw house by gluing on fake hay. The stick house was made with the sticks that I had in my art supplies, and the brick house was made with dipping sponges into red paint and stamping them like bricks.
D) Huff and Puff at the Science centre: the students pretended they were the wolf and they had to blow through the straw to see which materials blew away the easiest. They had to record how many times it took to move the material. For example, it only took one puff to move a feather and they huffed and puffed many times but couldn`t move the rock. Some words I was hearing were `the feather is lighter` and `the rock is too heavy`.


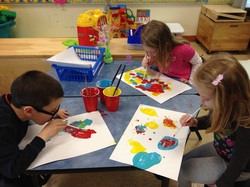
Huff and Puff Paintings
At the paint centre this week, the students pretended they were the wolf huffing and puffing through a straw to paint a picture.
At the paint centre this week, the students pretended they were the wolf huffing and puffing through a straw to paint a picture.
Importance of following steps
Last week the students learned how to draw four different farm animals by following directions. We learned how to draw a cow, pig, sheep and chicken. This week, I allowed the students to come up with their own animals to draw but I had them draw one step at a time. I left their creations at the Smartboard, so that their friends had a chance to try out their drawings.
Last week the students learned how to draw four different farm animals by following directions. We learned how to draw a cow, pig, sheep and chicken. This week, I allowed the students to come up with their own animals to draw but I had them draw one step at a time. I left their creations at the Smartboard, so that their friends had a chance to try out their drawings.
Huffing and Puffing
In the story the `Three Little Pigs`, the students knew that the straw house and stick house were easy for the wolf to blow down because the material used was too light. They knew that the brick house didn`t fall over because it was solid and sturdy. So, as a class we wanted to test this out. I provided them with fake hay and popsicle sticks. As a whole group, they built the houses themselves and then tested their theory by huffing and puffing through a straw. We still haven't had time to do the brick house but will be doing it this week.
In the story the `Three Little Pigs`, the students knew that the straw house and stick house were easy for the wolf to blow down because the material used was too light. They knew that the brick house didn`t fall over because it was solid and sturdy. So, as a class we wanted to test this out. I provided them with fake hay and popsicle sticks. As a whole group, they built the houses themselves and then tested their theory by huffing and puffing through a straw. We still haven't had time to do the brick house but will be doing it this week.


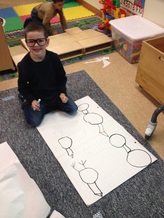
Story Map
This week, we began discussing what a story map is and used the story of the three little pigs to help us. A story map is a strategy that uses a graphic organizer to help students learn the elements of a book or story. By identifying story characters, plot, setting, problem and solution, students read carefully to learn the details. There are many different types of story map graphic organizers out there. The most basic focus on the beginning, middle, and end of the story. More advanced organizers focus more on plot or character traits. So far, we have had a chance to discuss what the characters are in the Three Little Pigs and the setting. Next week, we will be discussing the problem and solution in the story and we will also be learning about the different character traits for the three pigs and the wolf. I will also read a different version of the story where we can compare the characters, setting and problem and solution.
This week, we began discussing what a story map is and used the story of the three little pigs to help us. A story map is a strategy that uses a graphic organizer to help students learn the elements of a book or story. By identifying story characters, plot, setting, problem and solution, students read carefully to learn the details. There are many different types of story map graphic organizers out there. The most basic focus on the beginning, middle, and end of the story. More advanced organizers focus more on plot or character traits. So far, we have had a chance to discuss what the characters are in the Three Little Pigs and the setting. Next week, we will be discussing the problem and solution in the story and we will also be learning about the different character traits for the three pigs and the wolf. I will also read a different version of the story where we can compare the characters, setting and problem and solution.


Three little pigs sequencing activity:
For this activity, I asked the students to sequence the story. I encouraged them to look at the pictures and remember what house came first, second, third, etc. I then asked them to retell the story to me to see if they were able to retell the story on their own. One student even asked me to turn his work into a hat. After that, the whole class was a wearing their work!!!
For this activity, I asked the students to sequence the story. I encouraged them to look at the pictures and remember what house came first, second, third, etc. I then asked them to retell the story to me to see if they were able to retell the story on their own. One student even asked me to turn his work into a hat. After that, the whole class was a wearing their work!!!
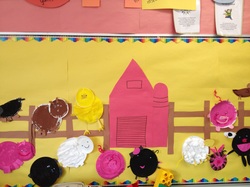
Welcome to South March Farm:
For this activity, I asked them to make their favourite farm animal. I provided them paper plates and told them that if they needed anything else to ask. Some students ask for pipe cleaners to make a tail, feathers for their duck, yarn for their horses tail, etc. They are absolutely adorable. I have quite the artists this year.
For this activity, I asked them to make their favourite farm animal. I provided them paper plates and told them that if they needed anything else to ask. Some students ask for pipe cleaners to make a tail, feathers for their duck, yarn for their horses tail, etc. They are absolutely adorable. I have quite the artists this year.
March 31-April 4
I can't believe we are in April already and that there is only 12 weeks of school remaining!!! Time sure flies!! We are slowly starting to see signs of spring. On the yard, the snow is starting to melt away and turn into big splashing puddles. We saw some Canadian geese flying home and buds sprouting on some trees. The students are really looking forward to when they can go on the structure again but the snow is just not melting away fast enough.
This week, we started to talk about the farm. We discussed what animals we see on the farm and the responsibilities of a farmer. We will be learning more about pigs, cows and sheep. Next week, we will be learning the "Three little pigs" in French.
CH, ON, OU sounds
This week, we have been focusing on the sounds CH, ON, and OU in French. We first learned what each sound sounded like. For example, for the sound CH, we pretend that we were whispering, OU we pretend that we were are looking at something far away and for ON, we made a circle with our hands.
We then sorted different objects according to each of these sounds. For example, in the word VACHE we hear the sound CH.
For a follow up activity, I had them sort objects on their own. It was amazing how well they picked up on the sounds and it was great to see them sounding out each object.


Learning how to draw some farm animals
Yesterday, we talked about the importance of directions and how it is important to follow each step in order. I showed the students how to draw a pig, sheep, cow and rooster on their own. They are quite the artists.
Yesterday, we talked about the importance of directions and how it is important to follow each step in order. I showed the students how to draw a pig, sheep, cow and rooster on their own. They are quite the artists.


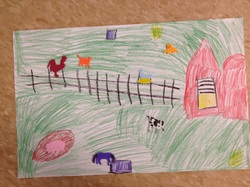
The farm
At one of the free centres this week, the students drew what they thought their own farm would look like. I provided them with farm animal stickers and they did the rest.
At one of the free centres this week, the students drew what they thought their own farm would look like. I provided them with farm animal stickers and they did the rest.
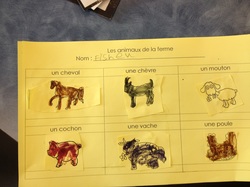
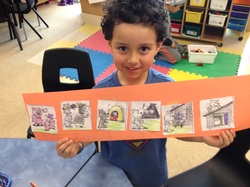
At the writing centre this week, the students were asked to match the animal to the word. They were encouraged to sound out each letter to help them determine which animal it is.
My very own farm
At the sand table this week, I provided the students with farm animals, fences, a windmill, rocks, and trees to make their very own farm. Many students created pens for the animals and a place where they could eat.
At the sand table this week, I provided the students with farm animals, fences, a windmill, rocks, and trees to make their very own farm. Many students created pens for the animals and a place where they could eat.
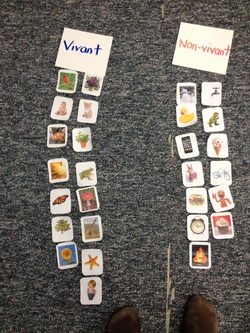
Living or non-living
At the science centre this week, the students sorted living and non-living things. They had to ask themselves: Does it eat, drink or breathe? Can it move or change?
At the science centre this week, the students sorted living and non-living things. They had to ask themselves: Does it eat, drink or breathe? Can it move or change?

April Fool's Day/ Poisson d'avril
Happy April Fool's Day everyone or shall I say Poisson d'avril! We had a very fun and exciting day. The students have never laughed so hard and all I could hear was giggles all day long. I first read a book about April Fool's Day that explained what it is and where it came from. I then showed them a video that gave them a clue as to what we were going to do that day. A very popular joke is to put a fish on someone's back when they are not looking and then say 'Poisson d'avril'. So, I gave the students a chance to make their own fish and test it on their friends. Sorry, if some tested it on you at home! (:
For this activity, they first had to do a rubbing of their shoe and then they turned it into a fish. I told them that some time through out the day, they were to sneak up on someone and put their fish on their back. As you can see, I was a very popular target. They had so much fun and laughed and laughed and laughed all morning long. I'm sure they would love to do this every day!


New building blocks
One of the new toys we received this week (part of the Full Day Kindergarten program), was some wooden building blocks. It has been the most popular centre this entire week. The students have been busy making ramps, bridges, houses and even barns to hold the farm animals.
One of the new toys we received this week (part of the Full Day Kindergarten program), was some wooden building blocks. It has been the most popular centre this entire week. The students have been busy making ramps, bridges, houses and even barns to hold the farm animals.
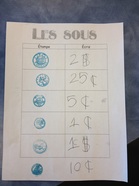
Coins
At a free centre this week, the students were asked to stamp each Canadian coin and then write what they are worth. As well, the students had the opportunity to buy different items and practice adding with different coins. For example, 8 cents can be 5 cents and 3 pennies.
At a free centre this week, the students were asked to stamp each Canadian coin and then write what they are worth. As well, the students had the opportunity to buy different items and practice adding with different coins. For example, 8 cents can be 5 cents and 3 pennies.
March 24-28
Living or non-living things
This week, the students have been learning about living and non-living things. I first asked the students to tell me what a living thing is and I wrote their answers on a chart piece of paper. The students told me that living things have a heart, have a face, have hands, have fur, can talk, etc. I realized then, that they weren`t exactly sure what all living things have in common and I wanted them to come up with them on their own. So, I then showed them a powerpoint presentation that had different pictures. For each picture, I asked them how do I know this object is living or non-living. Eventually, they were able to tell me that living things need to:
- move
- eat food
- need water
- breathe
- reproduce
The next day we then sorted different objects into living or non-living categories. I asked them the same things above for each picture. I encouraged them to ask themselves the same questions.
But then we came to fire. Fire can move and it can grow. So, then they thought it must be a living thing. But then I told them that a living thing always needs all of the things above to make it a living thing.
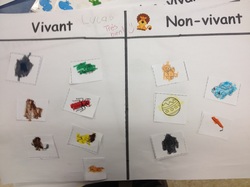
Living or non-living sorting
For this activity, the students just needed to sort things into living and non-living cater
For this activity, the students just needed to sort things into living and non-living cater
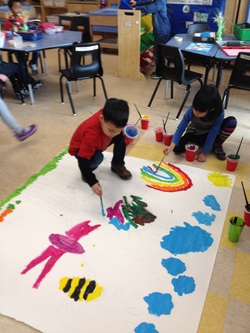
Spring mural
At circle time, we reviewed what the different signs of spring were. They told me that:
- the grass grows
- we start to see insects
- the bears come out of hibernation
- we can ride our bike
- it rains a lot
- we see rainbows
- flowers grow or we can plant a garden
So, with all of these signs of spring, the students drew a mural. Each student was in charge of drawing and painting one thing. I know it doesn`t look like spring outside but it`s certainly starting to look like spring in our classroom.
In spring, my favourite thing to do is...
After discussing spring last week, I wanted to know what their favourite thing to do in spring was. In class, we have been working on syllables and why they are important when we read and write. We have been clapping syllables out for many different words and have been working on blending letters together. So for this activity, they told me what their favourite thing was and then I translated it for them in French. One word at a time, they tried to write it on their own. I am so impressed with how they are starting to take their knowledge of the alphabet (letter identification and sounds) and put it on paper. So many children were even able to write some star words on their own.
At this age, many children want to write words perfectly and they sometimes get frustrated that they didn`t spell the word correctly. As a class, we have discussed that the first stage to writing is trying and that it is okay to make mistakes. I`m not looking for words that are spelled correctly. I find it really important that children play with letters and their sounds. There are many letters in the alphabet that sound alike. For example, some students were not sure if the word carotte (carrot) started with a c or a k. I explained to them, that once they have seen the word many times, they will eventually learn that the word carotte always starts with the letter c.


Wikki Stix and spring
Wikki Stix have been very popular in my class. If you are not sure what they are, they are sticks made of wax and they can stick to almost anything. I usually use them to find certain words or letters in our shared readings but I thought I just put them out and have them do what they wanted. They were very creative with their creations. I could have taken more pictures because they made so many things but below are just some examples.
Wikki Stix have been very popular in my class. If you are not sure what they are, they are sticks made of wax and they can stick to almost anything. I usually use them to find certain words or letters in our shared readings but I thought I just put them out and have them do what they wanted. They were very creative with their creations. I could have taken more pictures because they made so many things but below are just some examples.


Writing words we know
At the writing centre, I encourage the students to write words they already know how to spell or try and write a new word. They had to paint their words using water. It was really exciting for me to see them write many of the star words that we have been learning since January. I`m so proud of them!!!
At the writing centre, I encourage the students to write words they already know how to spell or try and write a new word. They had to paint their words using water. It was really exciting for me to see them write many of the star words that we have been learning since January. I`m so proud of them!!!
Birdhouses
At one of the free centres this week, the students had an opportunity to make their own birdhouses. I provided them with plasticine and toothpicks and left it in their hands to do what ever they wanted. It turned out to be a very popular centre and some students even made 3 birdhouses to bring home. At first it was hard to put it together but eventually they got the hang of it. Some had to use more toothpicks to make it sturdier and others had to change the shape of their birdhouse to make it sturdier. It was fun watching them so focused on what they were doing. After they completed their houses, they were asked to draw a picture of it. We discussed what architects do and how it is important for them to draw what they want to build.
At one of the free centres this week, the students had an opportunity to make their own birdhouses. I provided them with plasticine and toothpicks and left it in their hands to do what ever they wanted. It turned out to be a very popular centre and some students even made 3 birdhouses to bring home. At first it was hard to put it together but eventually they got the hang of it. Some had to use more toothpicks to make it sturdier and others had to change the shape of their birdhouse to make it sturdier. It was fun watching them so focused on what they were doing. After they completed their houses, they were asked to draw a picture of it. We discussed what architects do and how it is important for them to draw what they want to build.


Our growing garden
For this activity the students worked in partners and measured themselves with yarn. They then had to find something in the class that was the same size as them. I was really excited to hear words like " I'm longer than that, or I am to short for that". Once they found something the same size as them, they drew a picture of it and tried to spell the word on their own. They then created their own flower and I printed their school picture and they glued it on their flower. At the end of the day, we put all the flowers on the carpet and we discussed who in the class was the tallest, shortest, and which students were the same height. In the next week or two, the students will be bring their flowers home in an envelope and I would encourage them to find things at home that are the same height as them, or things that are shorter or longer then them. Encourage them to use the terms:
- shorter "plus court"
- longer "plus long" and
- the same "la meme"


March 17-21
This week we discussed St. Patrick`s Day, the body and spring.
This week we discussed St. Patrick`s Day, the body and spring.
Labeling the body
For this activity, the students had to work in teams. One person was chosen to be traced. Once they traced the body, they coloured it in to ressemble the person being traced. They then had to label the body parts. I provided them the cards to copy from but some students wanted to write some of the words on their own. They look pretty awesome! We hung them up in hallway near our cubbies for everyone to see and for them to practice saying the body parts in French.
For this activity, the students had to work in teams. One person was chosen to be traced. Once they traced the body, they coloured it in to ressemble the person being traced. They then had to label the body parts. I provided them the cards to copy from but some students wanted to write some of the words on their own. They look pretty awesome! We hung them up in hallway near our cubbies for everyone to see and for them to practice saying the body parts in French.


Can you believe it's spring!!
You can't tell by looking outside but it's finally spring. Today we discussed what are some signs of spring (i.e., sun is out longer, snow is starting to melt, and it's getting a little warmer). The students were able to identify many signs but it was a little confusing for them because when we looked out our window all we saw was snow. We discussed how spring happens over time and that it doesn't just happen right away. I'm hoping when more snow melts, we will be able to go outside on a nature walk and actually observe different signs of spring. For this activity, the students first had to make an umbrella (tracing a template) and write four signs of spring on raindrops.
You can't tell by looking outside but it's finally spring. Today we discussed what are some signs of spring (i.e., sun is out longer, snow is starting to melt, and it's getting a little warmer). The students were able to identify many signs but it was a little confusing for them because when we looked out our window all we saw was snow. We discussed how spring happens over time and that it doesn't just happen right away. I'm hoping when more snow melts, we will be able to go outside on a nature walk and actually observe different signs of spring. For this activity, the students first had to make an umbrella (tracing a template) and write four signs of spring on raindrops.


Costco
The house centre is slowly turning into a Costco. This week the students started to make their own signs. I provided them with different sizes of paper and markers. Before they made the signs,we discussed what we could buy at Costco. They said we could buy fruits and vegetables, clothes, furniture, hats, french fries, hot dogs and toys. They have made signs for each of those things. This week, we will learn what the different coins are in French, so they can practice saying them when they buy things. We are also going to try and make a conveyer belt to put items on when they go to the check out. They are going to try and make it with blocks.
The house centre is slowly turning into a Costco. This week the students started to make their own signs. I provided them with different sizes of paper and markers. Before they made the signs,we discussed what we could buy at Costco. They said we could buy fruits and vegetables, clothes, furniture, hats, french fries, hot dogs and toys. They have made signs for each of those things. This week, we will learn what the different coins are in French, so they can practice saying them when they buy things. We are also going to try and make a conveyer belt to put items on when they go to the check out. They are going to try and make it with blocks.


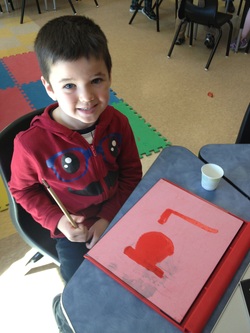
Mr. Potato Head
Since we were learning about different parts of the body in French this week, the kids came up with some silly Potato Heads. They had to say each body part in French.
Since we were learning about different parts of the body in French this week, the kids came up with some silly Potato Heads. They had to say each body part in French.


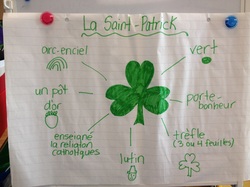
St. Patrick's Day
Since some people celebrate St. Patrick's Day, we discussed what it is and why people celebrate it. I read them a book all about St. Patrick's Day and they had to tell me (with one word) what they learned.
Since some people celebrate St. Patrick's Day, we discussed what it is and why people celebrate it. I read them a book all about St. Patrick's Day and they had to tell me (with one word) what they learned.
Four leaf clovers
At the paint centre this week, the students painted a four leaf clover but they had to make a different shade of green. We discussed how adding white to colours make the colours lighter. They had fun experimenting with it.
At the paint centre this week, the students painted a four leaf clover but they had to make a different shade of green. We discussed how adding white to colours make the colours lighter. They had fun experimenting with it.
Four leaf clover addition and subtraction
At the sand table, the students practiced their addition and subtraction. They came up with their own questions and had to write the answers on the sheet provided. They used different kinds of clovers. Some even turned it into a game and had to find their clovers.
At the sand table, the students practiced their addition and subtraction. They came up with their own questions and had to write the answers on the sheet provided. They used different kinds of clovers. Some even turned it into a game and had to find their clovers.

February 24-28
I Eat a Rainbow
This week, I taught the children about the four food groups. We discussed why it is important to eat healthy food, we sorted different foods into the right group and created our own meals (eating something from every group). The four food groups are as followed:
1. Fruits and Vegetables (green): This is the biggest part of the rainbow because we need to eat more from this group. I taught the children that the foods in this group are usually bright colours and that the food either grows on trees, bushes or plants.
2. Cereal Group (yellow): This group is usually the foods that people have to make or do something to, it can't just grow on its own. The food in this group is either yellow, brown or white. You may hear from your children that it is the "boring" colours.
3. Milk Group (blue): Most of the food in this group is made from milk.
4. Meat and Alternatives (red): Most food from this group comes from animals. It is sometimes difficult to get the alternatives but with practice they will get it.
One of the activities we did this week was "I Eat a Rainbow". I first had the children paint a rainbow of the four food groups. Then they had to cut foods from flyers for each food group. This week, the children are going to make their own foods to fill up the rainbow.


Preparing a Healthy Meal
At this centre, the children had to prepare a healthy meal with the food provided. They certainly enjoyed showing me how hungry they were!
At this centre, the children had to prepare a healthy meal with the food provided. They certainly enjoyed showing me how hungry they were!

Sorting Foods into Healthy or Not Healthy
On the Smartboard this week, I found a great game that allowed the children to sort the food into healthy or not healthy.
On the Smartboard this week, I found a great game that allowed the children to sort the food into healthy or not healthy.
Fruit survey: Today, the class discussed what a survey is and why people like to do to them. Since we have been learning about different types of foods, the class did a survey on their favourite fruits. The children first cut out 3 fruits that they liked best and glued them to their sheet of paper. We discussed that everyone's sheet was going to be different because we all like different fruit. We reviewed how to write tallies (which we have done for quite some time and now and they are pro's at it) and how they were to ask their friends in French. Once everyone completed their sheet, then the fun began. 0One challenge that they had was remembering who they had asked. I helped them by writing all the names on the whiteboard and suggested they do either all girls first or all the boys. In the end, they had to tell me what the class liked the most and what the class like the least on their sheet. They had a fun time doing this activity. I'm sure I will do more surveys again.


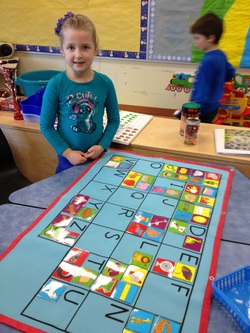
February 18-21, 2014
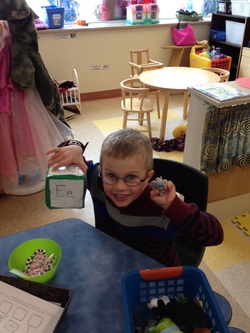
At the alphabet centre this week, the children had to roll the dice and identify the letter in French. They then had to find an object that started with that letter in a basket. The letters they focused on were A-F.
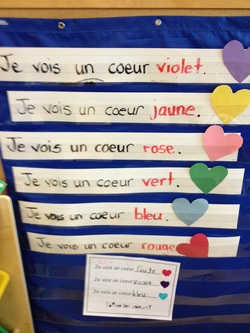
I see a ___________ heart.
At the writing centre this week, the students first had to match the word in red to the same colour of heart. Afterwards, they wrote 3 different colours down and coloured in the heart the same.
At the writing centre this week, the students first had to match the word in red to the same colour of heart. Afterwards, they wrote 3 different colours down and coloured in the heart the same.
Scientists in School - Winter Wonders
This is the first year this work shop has been out and I am so happy we chose to have it come to our school. It was one of the best workshops I have ever had. The children got to do 5 different centres.
Centre # 1: At this centre, the children got to xplore how local animals survive a cold climate. They learned about adaptation, migration and hibernation.
Centre # 2: At this centre, the children learned all about snowflakes. They learned that a snowflake is like a hexagon and always has6 sides and are always different. They had the opportunity to look at different snowflakes through a microscope and even make a snowflake of their own.
Centre # 3: At this centre, the children learned about insulation. They got to see how our coats, mittens and boots are insulated with layers and how houses keep us warm. They even learned why certain animals can live in the winter because of their flubber.
Centre # 4: At this centre, the children became meterologists and studied winter weather. They learend how snow, freezing rain and ice pellets are formed
Centre # 5: At this centre, the children had the oportunity to identify winter birds, listen to their songs and even construct a birdfeeder.


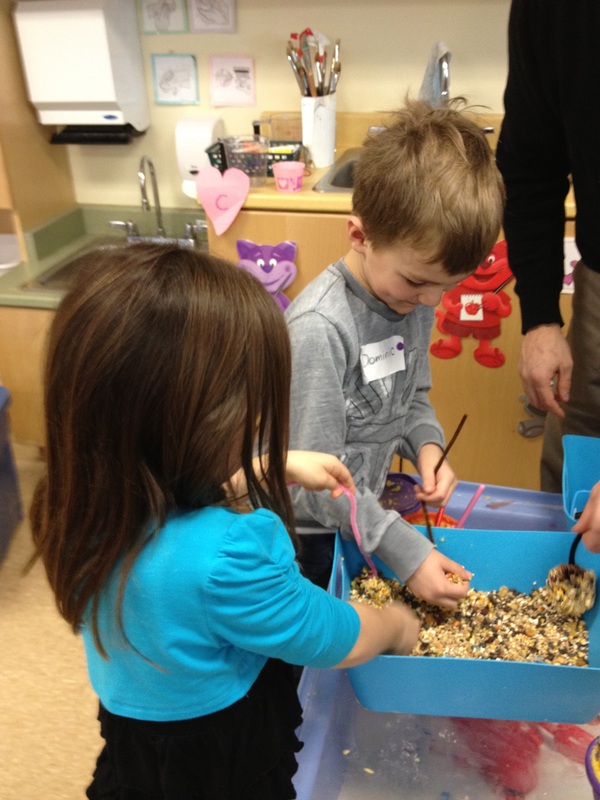


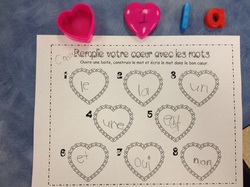
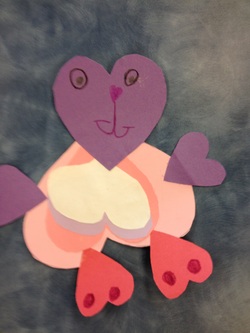
February 10-14
Well, this was a very busy week but a very fun week. We celebrated the 100th day of school and Valentine's Day. We have been practicing counting to 100 for so long, we were so excited to finally get to there. The children have also been learning how to count by 10's in French and have done very well.
Well, this was a very busy week but a very fun week. We celebrated the 100th day of school and Valentine's Day. We have been practicing counting to 100 for so long, we were so excited to finally get to there. The children have also been learning how to count by 10's in French and have done very well.
Valentine's Day!
Here the children are hard at work handing out their Valentines. They first decorated their bags and then I asked them a few at a time to hand out their Valentines. It went very smoothly! After all the Valentines were given to me, I decided to take all of their valentines and make a book. I glued each of their Valentines on a sheet of paper and then wrote their name beside it. I read the book to the class and I will give them the opportunity to read their friends names and see who game me which Valentine.
Here the children are hard at work handing out their Valentines. They first decorated their bags and then I asked them a few at a time to hand out their Valentines. It went very smoothly! After all the Valentines were given to me, I decided to take all of their valentines and make a book. I glued each of their Valentines on a sheet of paper and then wrote their name beside it. I read the book to the class and I will give them the opportunity to read their friends names and see who game me which Valentine.


Happy Valentine's Day/ Joyeuse St. Valentin!
We hope you all had a wonderful Valentine's Day. Our gift to all the parents is a tissue paper heart that says "I love you/Je t'aime".
We hope you all had a wonderful Valentine's Day. Our gift to all the parents is a tissue paper heart that says "I love you/Je t'aime".

At the playdough centre this week, I provided the children with heart cookie cutters. They were encouraged to make things using only the heart cookie cutters. Here you see a flower.
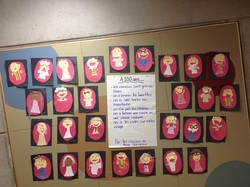
At 100 years old, I will look like...
I first showed the children a video that had 100 different people of every age from 1-100. We then discussed what would happen to us as we got older. The children said our hair will either be white or gray, we would need glasses, we would move slower, we would get wrinkles and we would either need a cane or a wheelchair. I then had them make themselves at 100. I provided the paper for the dress or shirt, cotton and yarn for the hair or beard/mustache. They are absolutely adorable. I can't wait for you to see them.
I first showed the children a video that had 100 different people of every age from 1-100. We then discussed what would happen to us as we got older. The children said our hair will either be white or gray, we would need glasses, we would move slower, we would get wrinkles and we would either need a cane or a wheelchair. I then had them make themselves at 100. I provided the paper for the dress or shirt, cotton and yarn for the hair or beard/mustache. They are absolutely adorable. I can't wait for you to see them.
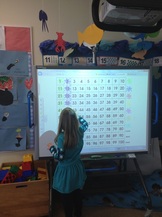
100's chart on the Smartboard
On the Smartboard this week the children had the opportunity to count all the way to 100. As they said the number they painted it. Some children counted by 1's others by 10.
On the Smartboard this week the children had the opportunity to count all the way to 100. As they said the number they painted it. Some children counted by 1's others by 10.
Tower using 100 blocks
As a class, we made a tower using 100 blocks. Each student either had 5-7 blocks and one at a time they built a tower.
As a class, we made a tower using 100 blocks. Each student either had 5-7 blocks and one at a time they built a tower.


100th Day activities
We first started the day by counting to 100 using the Smartboard. We then said our 100th day poem and read a book about the 100th day of school. Thank you to the parents that helped out, I couldn't of had done it with out you. Some of our 100th day activities were as followed:
1. 100 Fruit loop necklace: the children were asked to count by 10's using the 5 different colours of Fruit loops.
2. 100th Day hat: this was a great activity but it did take a long time. The children were asked to make groups of 10 using a variety of different items (i.e., stickers, stamps, hearts, writing their name, number 100, etc.). They then glued it to the main part and voila, a crazy hat! The hat said ``___ is 100 days smarter! (100 jours plus intelligent!)
3. 100 tallies: the children have been learning how to write tallies (another way of showing numbers), so for this activity they just had to do 100 tallies. Later next month, we will be using tallies more often when we learn how to do surveys with our friends.
4. Rolling to 100: the children were asked to roll the dice. They had to colour in the same amount of squares, roll again and again until they got to 100. They were encouraged to use different colours to see how many times it took them to roll to 100.


Celebrating the Olympics some more
This week the children had the opportunity to make their own Olympic flag and make their own medals. I provided the children with yellow, gray and brown paper, yarn and a hole punch. They did all the work. I think I saw quite a few gold medals running around!
This week the children had the opportunity to make their own Olympic flag and make their own medals. I provided the children with yellow, gray and brown paper, yarn and a hole punch. They did all the work. I think I saw quite a few gold medals running around!


Being creative with our bodies
In gym class, the children used their bodies to make the number 100. They had to discuss and plan how they were going to create each number. It was much harder then they thought but in the end they did it!


The Winter Olympics
We are very excited that the Olympics have finally arrived! The Olympics is very new to them, since the last time the winter Olympics happened, the children were only 2 or 3. So, I first showed the children a powerpoint presentation explaining what the winter Olympics are, where it is, and what sports we will see. I wanted the children to experience how the Olympics start, so the children created their own Olympic torches. I had them trace their own semi circle and then add tissue paper for the fire. In class, we will be following Canada's medal count daily, the children will have an opportunity to make our flag and create their own medals. At the end of the month we will celebrate our own Olympics Day.


An Olympic fan
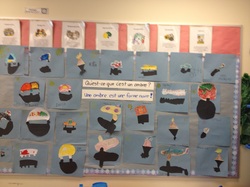
Shadows
Since it was Groundhog day on the weekend, we were discussing what a shadow is and how we see one. They learned that shadows look very similar to their object, just without colour. For this activity, the children drew their own picture of anything they wanted and then cut it out with a black piece of paper behind it. They then glued both pieces of paper on a blue background, so we could see the shadow. They turned out great!
Since it was Groundhog day on the weekend, we were discussing what a shadow is and how we see one. They learned that shadows look very similar to their object, just without colour. For this activity, the children drew their own picture of anything they wanted and then cut it out with a black piece of paper behind it. They then glued both pieces of paper on a blue background, so we could see the shadow. They turned out great!
Projector shadows
I provided the children with a projector and encouraged them to make their own shadows using their hands or to bring objects from around the room. They had a lot of fun with this activity.


The importance of knowing our phone number
This week we discussed why it is important to know our phone number, who to give our phone number too and who we shouldn't, and when to call 911. I provided the children learn their own phone number and they got to create their own telephones to practice them on.


January 27-31
Pretty hard to believe that January is over! Time has sure has flown. This week the children were very busy building vehicles, painting murals, measuring vehicles, creating cities and roads and much more.
Pretty hard to believe that January is over! Time has sure has flown. This week the children were very busy building vehicles, painting murals, measuring vehicles, creating cities and roads and much more.
Artists at work!!!
Below you will find the work of some pretty great artists. We discussed how vehicles can move (fly, float, roll or slide) and how they help us get from one place to another. The children painted four different murals. They first drew their picture and then they painted them. The morning class did: it rolls and it floats and the afternoon did: it flies and it slides. After the murals dried, they had the opportunity to make vehicles to go on their murals. I just provided the paper, glue, decorations and scissors.
Below you will find the work of some pretty great artists. We discussed how vehicles can move (fly, float, roll or slide) and how they help us get from one place to another. The children painted four different murals. They first drew their picture and then they painted them. The morning class did: it rolls and it floats and the afternoon did: it flies and it slides. After the murals dried, they had the opportunity to make vehicles to go on their murals. I just provided the paper, glue, decorations and scissors.


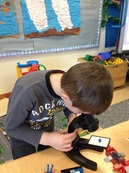
Microscopes
This week, I let the children look at objects around the classroom that they wanted to see up close.
This week, I let the children look at objects around the classroom that they wanted to see up close.
What does your hat look like?
Today, I asked the kids to bring in their hats. They were all very confused but very excited! All of their hats were different and I wanted them to tell me what was different about them and how they could describe their hat in one word. We found this hard to do because we wanted to say more than one thing that described their hat. I encouraged them look at their hat (think about the colours, etc) and touch their hat (how does it feel?). After we each got a chance to describe their hat, I had them draw a picture of it and their one descriptive w
Today, I asked the kids to bring in their hats. They were all very confused but very excited! All of their hats were different and I wanted them to tell me what was different about them and how they could describe their hat in one word. We found this hard to do because we wanted to say more than one thing that described their hat. I encouraged them look at their hat (think about the colours, etc) and touch their hat (how does it feel?). After we each got a chance to describe their hat, I had them draw a picture of it and their one descriptive w


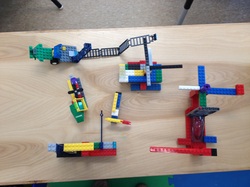
Lego vehicles
Here are a few Lego creations they made this week. They made helicopters, boats, trucks, planes and much more. They are very creative!
Here are a few Lego creations they made this week. They made helicopters, boats, trucks, planes and much more. They are very creative!
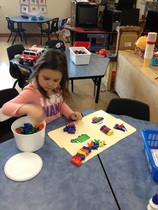
Sorting vehicles
Here the children had the opportunity to sort the vehicles. They sorted them by type of vehicle, how they move, what colour they were or how many wheels they had.
Here the children had the opportunity to sort the vehicles. They sorted them by type of vehicle, how they move, what colour they were or how many wheels they had.
Learning how to write a sentence
We have been learning about what a sentence is made up of and what does it mean. For example, a sentence always ends in a period, it always starts with a capital letter, etc. For this activity, I had typed 5 different sentences and put each word on a block. I gave each student a sentence which was colour coordinated. All the words were placed in a dump truck and were dumped on the table. They had to find their words with the matching colour and put it in order. Once they put it in order, they wrote in a piece a paper and drew a picture of what it said.
We have been learning about what a sentence is made up of and what does it mean. For example, a sentence always ends in a period, it always starts with a capital letter, etc. For this activity, I had typed 5 different sentences and put each word on a block. I gave each student a sentence which was colour coordinated. All the words were placed in a dump truck and were dumped on the table. They had to find their words with the matching colour and put it in order. Once they put it in order, they wrote in a piece a paper and drew a picture of what it said.


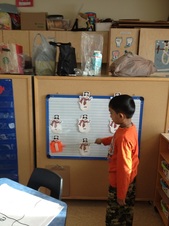
Practicing our sight words
Now that we have practiced our sight words, I let them practice on their own. They had to say the word and they hit it with the fly swatter. It's funny how letting the children hit something, makes it more motivating to do!!
Now that we have practiced our sight words, I let them practice on their own. They had to say the word and they hit it with the fly swatter. It's funny how letting the children hit something, makes it more motivating to do!!
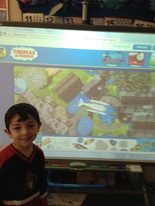
Making their own train tracks
Well this was a very fun Smartboard activity this week. They had to build their own train tracks, add houses, trees, water, etc. Then when they were finished, they go to see how their train moved on the tracks. They were really proud of their work!!!
Well this was a very fun Smartboard activity this week. They had to build their own train tracks, add houses, trees, water, etc. Then when they were finished, they go to see how their train moved on the tracks. They were really proud of their work!!!
Recycled vehicles
Below you will find the children hard at work making their recycled items. They knew exactly how they wanted to build it and how they wanted to decorate it. We just may have to do this again.
Below you will find the children hard at work making their recycled items. They knew exactly how they wanted to build it and how they wanted to decorate it. We just may have to do this again.


Snowball fight:
So, I found this idea on a kindergarten website and it was a huge hit! I wrote our star words for the month on a piece of paper and then scrumpled them up. I then told them we were having a snowball fight and many faces beamed. I let them throw the paper for a couple of minutes and then when I said stop, I had them find a piece of paper and one at a time they opend them up and tried to read them. If they couldn't read them, I helped them of course.
So, I found this idea on a kindergarten website and it was a huge hit! I wrote our star words for the month on a piece of paper and then scrumpled them up. I then told them we were having a snowball fight and many faces beamed. I let them throw the paper for a couple of minutes and then when I said stop, I had them find a piece of paper and one at a time they opend them up and tried to read them. If they couldn't read them, I helped them of course.


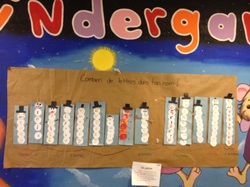
How long is your name?
This month, we are practicing identifying and writing our last names. When the children come into class every day, they have to find their name on the Smartboard and put it under the "I am here" column. So, to practice writing our last names, I had the children count how many letters are in their name and then write each letter on a circle (for the snowman body). At the end of the day, we analyzed which snowman was the shortest and which snowman was the longest.
This month, we are practicing identifying and writing our last names. When the children come into class every day, they have to find their name on the Smartboard and put it under the "I am here" column. So, to practice writing our last names, I had the children count how many letters are in their name and then write each letter on a circle (for the snowman body). At the end of the day, we analyzed which snowman was the shortest and which snowman was the longest.
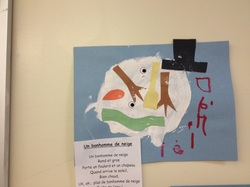
Melting snowman
One of our poems this month is about a melting snowman. It first starts off with a scarf, a hat, etc. and then the warm sun comes out and all that is left is a puddle of water. The children had to paint a puddle of water and then add the snowman parts. They turned out really cute! We have been working on identifying all the snowman parts in French, so this was a great activity to do that.
One of our poems this month is about a melting snowman. It first starts off with a scarf, a hat, etc. and then the warm sun comes out and all that is left is a puddle of water. The children had to paint a puddle of water and then add the snowman parts. They turned out really cute! We have been working on identifying all the snowman parts in French, so this was a great activity to do that.
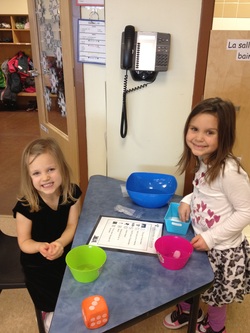
Who can melt their ice cube the fastest?
At the science centre, the children worked in pairs to see who can melt their ice cube the fastest. They each took a turn at rolling a dice and each number had them doing something different. For example, if they rolled a:
1 - they had to hold it for 10 seconds,
2 - they had to blow on it for 10 seconds
3 - they had to drop it down their shirt (this was the most fun!)
4 - they had to drop it to the ground
5 - they had to put salt on it
6 - they had to drop it in water for 10 seconds
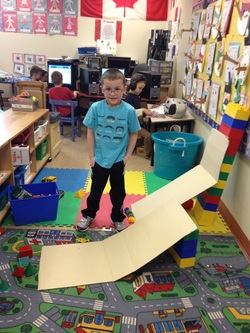
Ramp building
This week at the construction center, the children were asked to make a ramp and see which objects (different shapes) can roll or not roll down. I encouraged them to look at the shape of the object. Some children made very tall ramps, others were short. Of course, they learned that things that are round can roll down the ramp and when the ramp was tall, things that were flat could roll down as well.
This week at the construction center, the children were asked to make a ramp and see which objects (different shapes) can roll or not roll down. I encouraged them to look at the shape of the object. Some children made very tall ramps, others were short. Of course, they learned that things that are round can roll down the ramp and when the ramp was tall, things that were flat could roll down as well.
Tim Horton's Drive Thru
Well, this was a hit!!! The children are having so much fun. At one of the centres last week, I had them make their own signs (we discussed what we can buy at Tim Horton's and what a menu looks like) and menus. Items that were brought in were, different size coffee cups, trays, donut boxes, coffee tins, forks/spoons/knives, napkins, etc. They've been using the curtain from the puppet centre as the drive thru window. Thank you all for your donations.
Well, this was a hit!!! The children are having so much fun. At one of the centres last week, I had them make their own signs (we discussed what we can buy at Tim Horton's and what a menu looks like) and menus. Items that were brought in were, different size coffee cups, trays, donut boxes, coffee tins, forks/spoons/knives, napkins, etc. They've been using the curtain from the puppet centre as the drive thru window. Thank you all for your donations.


Playdough snowman
At the playdough centre, the children were asked to make a snowman. I provided the arms, buttons, beads and eyes and they did all the work.
At the playdough centre, the children were asked to make a snowman. I provided the arms, buttons, beads and eyes and they did all the work.


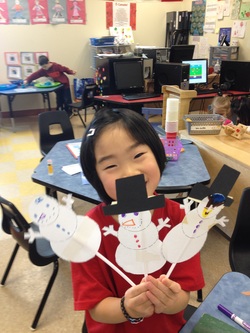
Snoman puppets
One of our poems this month was about 10 little snowmen. So, I thought it would be a good idea to have them make their own snowmen to go with the poem. They got to decorate them however they wanted and then put them in a paper bag, so they can retell the poem to you.
One of our poems this month was about 10 little snowmen. So, I thought it would be a good idea to have them make their own snowmen to go with the poem. They got to decorate them however they wanted and then put them in a paper bag, so they can retell the poem to you.
January 6-10
Welcome back everyone! I hope you all had a wonderful New Year. This week we had a lot of fun learning about snowmen. The children have been practicing what a snowman can wear in French and how we can build a snowman. Below you will find a few activities they
Welcome back everyone! I hope you all had a wonderful New Year. This week we had a lot of fun learning about snowmen. The children have been practicing what a snowman can wear in French and how we can build a snowman. Below you will find a few activities they
Building a snowman
At the Smartboard this week, the children had the opportunity to make their own snowman. It was fun to see because every snowman was different and unique.
At the Smartboard this week, the children had the opportunity to make their own snowman. It was fun to see because every snowman was different and unique.
Blending sounds
At the writing centre this week, I provided the children with magnetic letters and I encouraged them to blend two letters together. I wanted them to say the letters in French and then their sounds. After they created two letter sounds, they were able to write them on sticky notes or a piece of paper. This activity was for the children to feel comfortable making sounds and hearing them and not worry so much on making words.
At the writing centre this week, I provided the children with magnetic letters and I encouraged them to blend two letters together. I wanted them to say the letters in French and then their sounds. After they created two letter sounds, they were able to write them on sticky notes or a piece of paper. This activity was for the children to feel comfortable making sounds and hearing them and not worry so much on making words.
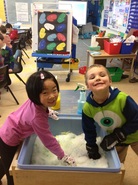
Mixing colours in the snow
This week in the water centre, I provided the children with LOTS of snow and spray bottles filled with the primary colours (red, blue and yellow). They were able to make things using the snow or they could just spray the snow and see what colours they could make.
This week in the water centre, I provided the children with LOTS of snow and spray bottles filled with the primary colours (red, blue and yellow). They were able to make things using the snow or they could just spray the snow and see what colours they could make.
Snowman Soup
For this activity, I told the children that they were going to make a snowman face and put it in a ziploc bag. I provided them with a carrot for the nose, 2 eyes and buttons for the mouth. First, they had to predict what they thought would happen to their snowman if we left it in the window for an hour. Some of their predictions were that it would melt, that it would be smooshy, would fall down, the face would be gone, etc.They then drew a picture of what their snowman face looked like before it hung in the window. After an hour, they then observed their snowman face and they noticed that many of their predictions were correct. They then had to draw a final picture of what their snowman looked like.
For this activity, I told the children that they were going to make a snowman face and put it in a ziploc bag. I provided them with a carrot for the nose, 2 eyes and buttons for the mouth. First, they had to predict what they thought would happen to their snowman if we left it in the window for an hour. Some of their predictions were that it would melt, that it would be smooshy, would fall down, the face would be gone, etc.They then drew a picture of what their snowman face looked like before it hung in the window. After an hour, they then observed their snowman face and they noticed that many of their predictions were correct. They then had to draw a final picture of what their snowman looked like.


December 9-19
Shapes, shapes , shapes
The last week we have been learning our shapes in French. We have discussed how many sides each shape has, if they have corners, and what's different about each one. I told them that we see shapes everywhere and they were very excited to find all sorts of shapes in the classroom. We practiced drawing our shapes, making pictures and robots with only shapes and we even made shapes with our bodies. It was a lot of fun.
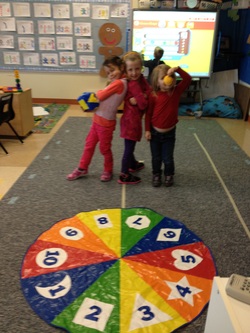
Shape game:
In this game the children had to rolla dice and then say the shape in French. They then had to throw a bean bag onto the mat that had the corresponding shape. The person closest to the shape got a point.
In this game the children had to rolla dice and then say the shape in French. They then had to throw a bean bag onto the mat that had the corresponding shape. The person closest to the shape got a point.


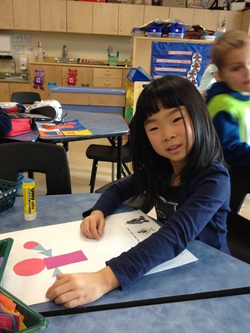


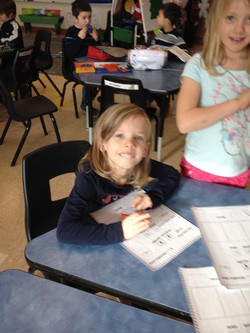
December 2-6
This week we did a lot with gingerbread men. Every activity in the classroom was using gingerbread men.
This week we did a lot with gingerbread men. Every activity in the classroom was using gingerbread men.

Playdough Gingerbread man
At the playdough center this week, I provided the children with a gingerbread man cookie cutter, buttons, eyes, and ribbon. They created their own gingerbread man. They were also able to make the letter B (since gingerbread man in French is bonhomme de pain d'epice) and they could make their own face. This activity worked on fine motor skills, since they had to roll out the dough.
At the playdough center this week, I provided the children with a gingerbread man cookie cutter, buttons, eyes, and ribbon. They created their own gingerbread man. They were also able to make the letter B (since gingerbread man in French is bonhomme de pain d'epice) and they could make their own face. This activity worked on fine motor skills, since they had to roll out the dough.
Teddy Bear Picnic
Well, we had a lot of fun at our Teddy Bear Picnic! After doing so many activities with our bears in the days before, it was fun just to play with our bears. We first went on a parade to either the office or some other kindergarten classes and sang our teddy bear song (very similar to the Hokey Pokey). They did a great job at singing and the other children really enjoyed our visit.
We then had many activities in the classroom that the children could do.
1. We got to make our teddy bear headbands.
2. They were able to sort gummy bears. This was a hard one because they really wanted to eat them!!
3. They got to throw their teddy bears in a basket. This was fun because they made it into a game with another student. Who ever got their bear in the basket first, won!
4. We did a teddy bear taste test. They had to taste a chocolate and a honey cookie. Afterwards they had to decide which was their favourite and write their name on the corresponding bear and put it on our graph. At the end of the day, we analyzed our graph. Most children liked the chocolate bears better.
5. At the playdough centre, they make teddy bears. They turned out very cute.
6. After our activities we then had a picnic on the carpet.
7. At the end of the day, we played a few games with the blanket (we pretended it was a parachute). At the very end, I let them try and throw their bears as high as they could using the blanket!!!


Measuring
I decided to be a little creative and had the children measure a giant gingerbread man using either small gingerbread men or candy. They had to count how many there were from the head to the feet. Then they had to put that many number of stickers beside the first gingerbread man. The next task was to measure themselves. They either had a partner or myself measure them with the same thing. They then had to tell me if they were taller or shorter than the gingerbread man. I then asked them to draw themselves beside the second gingerbread man (shorter or taller).
I decided to be a little creative and had the children measure a giant gingerbread man using either small gingerbread men or candy. They had to count how many there were from the head to the feet. Then they had to put that many number of stickers beside the first gingerbread man. The next task was to measure themselves. They either had a partner or myself measure them with the same thing. They then had to tell me if they were taller or shorter than the gingerbread man. I then asked them to draw themselves beside the second gingerbread man (shorter or taller).


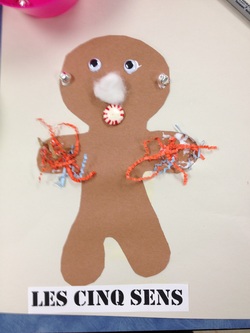
5 senses
This week we learned about our five senses. It was a very fun unit to teach. At the end of the week, the children became more aware of what sense they were using and realized that we use more than one sense for many different things (i.e., gingerbread man - we can taste it, smell it, touch it and see it). So for this activity, I had the children glue bells for our hearing, a candy for tasting, eyes for seeing, a cotton sprayed with pomegranate spray and curly paper for touching.
At one of the free tables, I put out 4 different buckets.
1. Touching - I put different materials of different textures
2. Seeing - I put out different cards that had different pictures (they had to describe what they saw)
3. Hearing - I put out different musical instruments
4. smelling - I put onion, garlic, lemon, vanilla in different ziploc bags (they certainly figured out quickly which smell they liked and which one they didn't!)
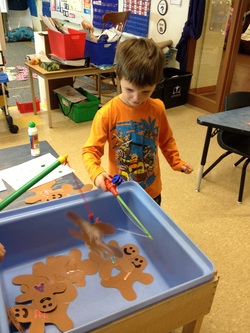
Fishing for gingerbread men
At the water centre this week, I put a letter on each gingerbread men. They had to fish for the gingerbread man and then bingo dab the lower case letter. I encouraged them to say the letter in French.
At the water centre this week, I put a letter on each gingerbread men. They had to fish for the gingerbread man and then bingo dab the lower case letter. I encouraged them to say the letter in French.
Teddy Bear activities
Here are a few activities that we did with our Teddy Bears this week:
1. Weighing our bears: The children had the opportunity to weigh their bears. I provided them with blocks. They had to count each block and make sure that it was balanced.
2. Teddy Bear sorting: we sorted our bears according to size, colour, if they had a tail and if they were wearing clothes.
3. Teddy Bear measuring: the children were asked to measure their teddy bears using unifix cubes


Pudding Bears!!!
This is one of my favourite activities to do with the children.
This is one of my favourite activities to do with the children.


Brown Bear, Brown Bear mural
To help us retell the story Brown Bear, Brown Bear, we did a class mural. The colours are in order of how the characters appear. Two students were responsable for painting one colour. I have read the story to the children many times, we have used props, we read it on a powerpoint presentation and we did it in a pocket chart activity. The children also have their own copy at school that they have been practicing. The children also got to do a mini version at the paint centre.
To help us retell the story Brown Bear, Brown Bear, we did a class mural. The colours are in order of how the characters appear. Two students were responsable for painting one colour. I have read the story to the children many times, we have used props, we read it on a powerpoint presentation and we did it in a pocket chart activity. The children also have their own copy at school that they have been practicing. The children also got to do a mini version at the paint centre.


Math activity:
Here the children were each given a card with animals from Brown Bear, Brown Bear. Every card had the same animals but a different amount. I provided unifix cubes for the children and they had to count each animal with the corresponding colour unifix cube. They then stacked the unifix cubes and put them in order from shortest to tallest. Afterwards, they counted the unifix cubes and wrote the number on their sheet. They then had to add different animals together.
Here the children were each given a card with animals from Brown Bear, Brown Bear. Every card had the same animals but a different amount. I provided unifix cubes for the children and they had to count each animal with the corresponding colour unifix cube. They then stacked the unifix cubes and put them in order from shortest to tallest. Afterwards, they counted the unifix cubes and wrote the number on their sheet. They then had to add different animals together.


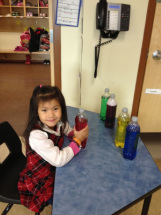
What's inside?
At the science centre this week, the children got to look at bottles that were different colours. But in each bottle was something different. For example, I had put soap in one, buttons in another and sprinkles. They had fun shaking them and watching what the objects did inside.
At the science centre this week, the children got to look at bottles that were different colours. But in each bottle was something different. For example, I had put soap in one, buttons in another and sprinkles. They had fun shaking them and watching what the objects did inside.

Lots of colours!
At the sand table this week, I had the children sort the objects according to their colours. I put a variety of different objects in.
At the sand table this week, I had the children sort the objects according to their colours. I put a variety of different objects in.
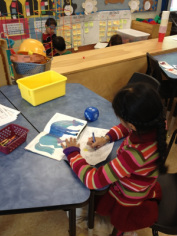
Roll and find
At one of the free tables this week, the children had to roll a dice, count the dots and then find that number on the sheet. They had to colour the animal according to the colour in the book Brown Bear, Brown Bear What do You See?. I provided the book for them if they needed it.
At one of the free tables this week, the children had to roll a dice, count the dots and then find that number on the sheet. They had to colour the animal according to the colour in the book Brown Bear, Brown Bear What do You See?. I provided the book for them if they needed it.
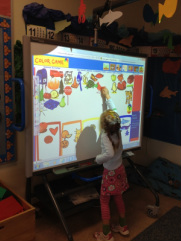
Colours, Colours, Colours
On the Smartboard this week, the children had to sort objects according to their colours.
On the Smartboard this week, the children had to sort objects according to their colours.
November 11-14th
Even though this week was a short week, we seemed to have done quite a bit in class. We read and watched the story Goldilocks and the three bears. The children learned about characters, the setting of a story and how to retell a story.
Even though this week was a short week, we seemed to have done quite a bit in class. We read and watched the story Goldilocks and the three bears. The children learned about characters, the setting of a story and how to retell a story.
Playdough bears
At the playdough centre this week, I put out a big bear, medium bear and small better cookie cutter. They had to make the bears and put them into a pattern on the mat provided.
At the playdough centre this week, I put out a big bear, medium bear and small better cookie cutter. They had to make the bears and put them into a pattern on the mat provided.


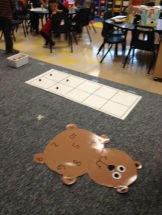
Bear game:
This week at the math centre, the children had to throw a bean bag onto a big bear and which ever number it landed on (or if it landed close to a number) they had to say it in French. Then they had to count the exact number on a big ten frame that I made using bear manipulatives. This activity helped the children practice 1:1 correspondence. They had a lot of fun!
This week at the math centre, the children had to throw a bean bag onto a big bear and which ever number it landed on (or if it landed close to a number) they had to say it in French. Then they had to count the exact number on a big ten frame that I made using bear manipulatives. This activity helped the children practice 1:1 correspondence. They had a lot of fun!
Goldilocks and the three bears
This week we read the book Goldilocks and the three bears. We discussed the characters in the story and the setting. To retell the story, we used the felt board. The children had to say the characters name and the size of the bowl, chair and bed in French. The children were very familiar with this story, so I decided to put the felt board out as a free centre for them to retell on their own.
This week we read the book Goldilocks and the three bears. We discussed the characters in the story and the setting. To retell the story, we used the felt board. The children had to say the characters name and the size of the bowl, chair and bed in French. The children were very familiar with this story, so I decided to put the felt board out as a free centre for them to retell on their own.


Building with straws
This week in the construction centre, I encouraged the children to make a house out of straws. At first they weren't sure how to make it get taller but once I showed them how to make a cube and how to expand it, they were very creative. There were some houses that were big, medium and small.
This week in the construction centre, I encouraged the children to make a house out of straws. At first they weren't sure how to make it get taller but once I showed them how to make a cube and how to expand it, they were very creative. There were some houses that were big, medium and small.
Reading our Goldilocks books
One of the must do's this week was making our own Goldilock book. I provided the words for the children and they had to draw the picture. Before they started I showed them how to make a bear, bowl, chair and bed. I also encouraged them to think about the size of the object. Their drawings were very cute. After all of our books were done. We read them as a whole class, then I had them read with a partner. One partner would listen and the other would read. I encouraged them to look at the picture to help them read the words. They did extremely well.
One of the must do's this week was making our own Goldilock book. I provided the words for the children and they had to draw the picture. Before they started I showed them how to make a bear, bowl, chair and bed. I also encouraged them to think about the size of the object. Their drawings were very cute. After all of our books were done. We read them as a whole class, then I had them read with a partner. One partner would listen and the other would read. I encouraged them to look at the picture to help them read the words. They did extremely well.


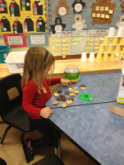
Bear games
At one of the free tables this week, I put out a jar of bears (vanilla and chocolate). I showed them a variety of different activities they could do with the bears. They could either make a pattern, put the bears in order of smallest to biggest (since they had hearts on their tummies), and work on 1:1 correspondence using a spinner.
At one of the free tables this week, I put out a jar of bears (vanilla and chocolate). I showed them a variety of different activities they could do with the bears. They could either make a pattern, put the bears in order of smallest to biggest (since they had hearts on their tummies), and work on 1:1 correspondence using a spinner.
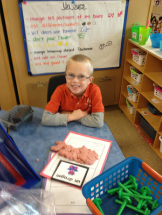
Letter D
At the writing centre this week, I provided the children with pictures of all the D words we have learned. They had to pick one of the words, read it, stamp it out into playdough and then write it.
At the writing centre this week, I provided the children with pictures of all the D words we have learned. They had to pick one of the words, read it, stamp it out into playdough and then write it.
November 4-8, 2013
This week we learned about families, bears and Remembrance Day. Below you will find a few activities that we did.
This week we learned about families, bears and Remembrance Day. Below you will find a few activities that we did.
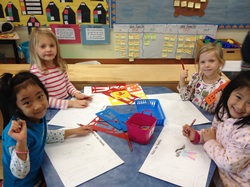
Family Stencils
At one of the free tables this week, the children were provided a variety of different family stencils. They were asked to trace their family members onto the page. Once finished, they were asked to tell me who was in their family in French. Some children liked this activity so much, they did it 2 or 3 times!
At one of the free tables this week, the children were provided a variety of different family stencils. They were asked to trace their family members onto the page. Once finished, they were asked to tell me who was in their family in French. Some children liked this activity so much, they did it 2 or 3 times!
House or Cave?
At the construction centre this week, the children were asked to build a house for their family or a cave for a bear. I didn't show them how to make one, they used their own creativity and they turned out great!
At the construction centre this week, the children were asked to build a house for their family or a cave for a bear. I didn't show them how to make one, they used their own creativity and they turned out great!


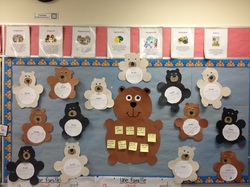
BEARS, BEARS, BEARS
This week we learned about bears. We learned that bears can be different colours, they live in caves, they eat a lot in the fall time, they hibernate during the winter and they like to eat fish and berries. The children they got to make a bear and they were asked to write one thing that they had learned on the bears tummy.
This week we learned about bears. We learned that bears can be different colours, they live in caves, they eat a lot in the fall time, they hibernate during the winter and they like to eat fish and berries. The children they got to make a bear and they were asked to write one thing that they had learned on the bears tummy.
Who is in your family?
I first read the book "The Family Book" to generate a discussion about their own families, how families are different, and how they are the same. We also talked about what different things their families like to do together. I wrote their answers down on a large piece of chart paper with 3 different categories: Families are, can and have.
Then we worked together to make the family glyph. The children were taught what each family member was in French. We worked through each family member on the house chart one at a time. We talked about what color represented that person. Then I worked one on one with the students and they told me who was in their family. They glued their squares on their house shapes.
After their glyphs were finished, we analyzed them together as a class. Students sorted themselves into groups on the carpet so that we could make comparisons and count groups. For example, students who have a brother stood on one side of the carpet while students who do not have a brother stood on the other side.


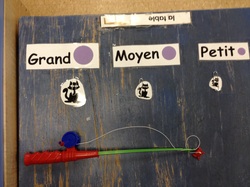
Going fishing
We have been working on comparing things that are big, medium and small this week. At the water table, I had them pretend they were bears going fishing for objects of different sizes. They had to find an object and put it under the correct size.
We have been working on comparing things that are big, medium and small this week. At the water table, I had them pretend they were bears going fishing for objects of different sizes. They had to find an object and put it under the correct size.
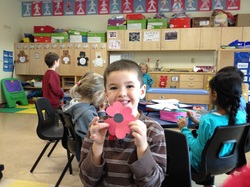
Remembrance Day
On Friday, I read the book "A Poppy is to Remember" to the children. We discussed what a poppy is and what it means (why we wear it every year on Nov.11). The children were asked to make a poppy and paint a poppy. All of our poppies were glued to a wreath that will be used in our assembly on Monday.
On Friday, I read the book "A Poppy is to Remember" to the children. We discussed what a poppy is and what it means (why we wear it every year on Nov.11). The children were asked to make a poppy and paint a poppy. All of our poppies were glued to a wreath that will be used in our assembly on Monday.
Playdough fun!
At the playdough centre this week, the children created a playdough family. I provided googly eyes, Q-tips, buttons, sticks, hair for the children. They did a fantastic job.
At the playdough centre this week, the children created a playdough family. I provided googly eyes, Q-tips, buttons, sticks, hair for the children. They did a fantastic job.


October 28th - November 1, 2013
We had a very fun week this week! It was filled with Halloween centres, games, and music. Here are a few activities we did.
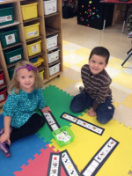
Halloween patterning
At the math centre this week, the children had to continue a variety of Halloween patterns. They could either work together or on their own.
At the math centre this week, the children had to continue a variety of Halloween patterns. They could either work together or on their own.
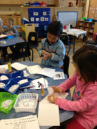
Toc, Toc, Toc, qui est a la porte?
This is one of my favourite books to do at Halloween time. I find it very repetitive for the children and they catch on very quickly. I first read the story to the class and they had to repeat me. Then the children had the opportunity to make their own book. For each page, a word was underlined and they had to find the correct word on flash cards. I encouraged them to look at the first letter but since there were a few words that started with the same letter, I encouraged them to look at the next letter and so forth until all letters mathced. They then glued the correct picture. They then had a chance to read the book with me, with a partner and as an entire class again. We had a lot of fun and they did some great reading!!!
This is one of my favourite books to do at Halloween time. I find it very repetitive for the children and they catch on very quickly. I first read the story to the class and they had to repeat me. Then the children had the opportunity to make their own book. For each page, a word was underlined and they had to find the correct word on flash cards. I encouraged them to look at the first letter but since there were a few words that started with the same letter, I encouraged them to look at the next letter and so forth until all letters mathced. They then glued the correct picture. They then had a chance to read the book with me, with a partner and as an entire class again. We had a lot of fun and they did some great reading!!!

Halloween graphing
One of our must-do's this week was to graph Halloween objects. Each child was given a cup full of different objects. The childen were asked to sort the objects first and then graph them. After all the objects were were graphed, they had to count them and write the number on top. They are starting to really get the hang of it. Bravo!
One of our must-do's this week was to graph Halloween objects. Each child was given a cup full of different objects. The childen were asked to sort the objects first and then graph them. After all the objects were were graphed, they had to count them and write the number on top. They are starting to really get the hang of it. Bravo!
Monsters
This week at the playdough centre, the children were given googly eyes, pipe cleaners, popsicle sticks and buttons to make monsters. Some monsters were happy, some scary, and some silly. Below yo will find their creations.
This week at the playdough centre, the children were given googly eyes, pipe cleaners, popsicle sticks and buttons to make monsters. Some monsters were happy, some scary, and some silly. Below yo will find their creations.


October 15th-25th
Pumpkins, Pumpkins, Pumpkins
The last two weeks have been very busy!!! We have learned a lot about pumpkins. We learned how a pumpkin grows, how to describe what a pumpkin looks like on the inside and outside, how to carve a pumpkin, and how to turn a pumpkin into a Jack-o-lantern.
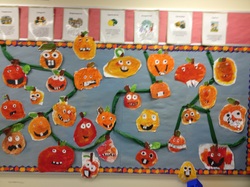
Pumpkin patch
This was a really fun activity. Last week the children had to mix red and yellow paint to make an orange pumpkin. As you can see, they are all very different. This week, I showed the kids a bunch of different faces they could make (sad, happy, funny, scary, etc.). I provided them with black and white paper and let them do what ever they wanted. It was so fun to watch what they wanted to come up with. Many wanted one tooth, some had spiky teeth and others wanted square teeth.
This was a really fun activity. Last week the children had to mix red and yellow paint to make an orange pumpkin. As you can see, they are all very different. This week, I showed the kids a bunch of different faces they could make (sad, happy, funny, scary, etc.). I provided them with black and white paper and let them do what ever they wanted. It was so fun to watch what they wanted to come up with. Many wanted one tooth, some had spiky teeth and others wanted square teeth.
Pumpkin Investigation
The children are becoming quite the scientists!! For two days we investigated a pumpkin. The children were put in pairs and had to work together.
1. First they had to draw a picture of what their pumpkin looked like (by colour, texture, smell, etc.).
2. They then had to draw what they thought their pumpkin would look like in the inside. Last week, we came up with very descriptive words for the inside of a pumpkin (stringy, slimy, seeds, cold, wet, etc.). Their drawings were excellent!
3. This week we started learning about how things can be big, medium, or small (grand, moyen, petit). I showed the children a bunch of different sized pumpkins and we sorted them according to their size. Then they had to circle what size of pumpkin they thought they had.
4. Then they had to estimate how many seeds would be inside of their pumpkin. This was fun to watch because many children estimated the same amount of seeds they had drawn. After every one was finished, I counted the seeds for them, since the average number of seeds was between 400-500! To my surprise their was more than I thought. Afterwards, we discussed who had the most and least amount of pumpkin seeds.
5. Then the children had to measure the circumference of their pumpkin by putting a string around the middle of the pumpkin. Everyone glued the string on their paper.
6. Then they had to guess if their pumpkin would float or sink. To their surprise it floated!!!
7. Lastly, they had to measure how tall their pumpkin was using unifix cubes. They had to count in French and then write the number down.
Below you will find some great scientists at work!


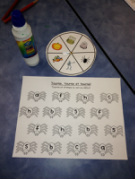
Spin and write the first sound
On Monday,we discussed different Halloween terms and I taught them in French (each one has an action for it as well). For this activity, the children had to spin the spinner and what ever it landed on, they had to say it out loud and listen for the first sound. Then with the Bingo dabber, they found the first sound on one of the spiders.
On Monday,we discussed different Halloween terms and I taught them in French (each one has an action for it as well). For this activity, the children had to spin the spinner and what ever it landed on, they had to say it out loud and listen for the first sound. Then with the Bingo dabber, they found the first sound on one of the spiders.
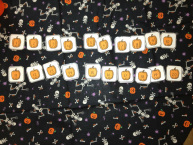
At one of the free tables this week, the children had to put pumpkins in order from 1-20.
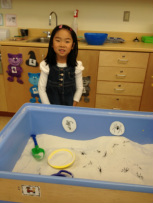
Find the spiders and skeletons
In the sand table this week, I hid spiders and skeletons and the children had to find them and sort them.
In the water table, I had bought special capsules that turned into Halloween things. They were extremely excited about this. It took about 5-10 minutes for the capsule to turn but the entire class was very excited and they would all come over to see what it changed into. Some things were witches, skeletons, pumpkins, etc.
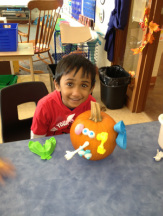
Mr. Pumpkin head
This was a hit!!! Instead of Mr. Potato head, I put out a pumpkin and they got to give it different silly faces. They had so much fun and were very excited to show me what they had created!
This was a hit!!! Instead of Mr. Potato head, I put out a pumpkin and they got to give it different silly faces. They had so much fun and were very excited to show me what they had created!
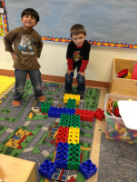
Block Skeletons
At the construction centre this week, I wanted them to create a skeleton using any of the blocks provided.
At the construction centre this week, I wanted them to create a skeleton using any of the blocks provided.
October 7th -10th
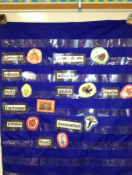
Fall words
As a whole class, we discussed what happens in the fall. I then typed their answers and printed off a picture to go with each
word. The children had to say the word and then find the correct picture. After doing it a few times as a whole class, I then put it in the pocket chart at the writing centre. The children had to match the picture to the word on their own. I did provide an answer sheet for when they had trouble with certain words.
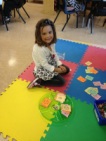
Leaf sorting
Last week we sorted leaves according to colour, shape and size. This week, I gave the chance for the students to do it on their own in the math center.
Last week we sorted leaves according to colour, shape and size. This week, I gave the chance for the students to do it on their own in the math center.
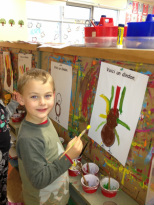
Arstists
This week at the paint centre, I drew the body of a turkey for the kids and they had to paint in their colourful feathers and bodies. They are quite the artists!!
This week at the paint centre, I drew the body of a turkey for the kids and they had to paint in their colourful feathers and bodies. They are quite the artists!!
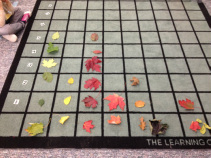
Leaf graph
When the children first brought in their leaves, we did a graph of the different coloured leaves we had. This gave us an opportunity to discuss more than (plus de) and less than (moins de) in French. The morning class had more red and green leaves and the afternoon class had more red leaves.
When the children first brought in their leaves, we did a graph of the different coloured leaves we had. This gave us an opportunity to discuss more than (plus de) and less than (moins de) in French. The morning class had more red and green leaves and the afternoon class had more red leaves.
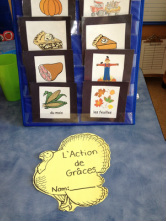
Thanksgiving writing
Since their are some children in our class that celebrate Thanksgiving, we discussed what Thanksgiving is and why it happens every year at this time. At the writing center, the children were able to pick some Thanksgiving words and write it in their turkey book. Some of their drawings were amazing! It is very hard to draw a turkey.
Since their are some children in our class that celebrate Thanksgiving, we discussed what Thanksgiving is and why it happens every year at this time. At the writing center, the children were able to pick some Thanksgiving words and write it in their turkey book. Some of their drawings were amazing! It is very hard to draw a turkey.
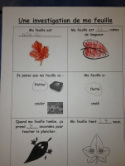
Leaf investigation
For two days the children had a chance to be scientists. We first talked about what scientists are and what they do (ask questions, experiment, etc.).
First, the children had to describe their leaf to me (colour). They had to colour in their leaf and write the word.
Second, they had to measure how long their leaf was using unifix cubes. They measured from the stem to the tip of the leaf. I had them count in French and then write the number. We've been working really hard at writing our numbers the right way.
Third, they had to guess if their leaf would float or sink. We talked about why things float and why thinks sink (i.e., things that are light and things that are heavy). We also discussed that scientists guesses can be wrong sometimes and that is okay. That scientists learn every time they make a wrong guess. Once they decided, they circled what they thought would happen.
The next day, the children then got to see if their leaf floated or sank. They then circled what happened. We discussed that a leaf floated because it is light.
They then got to see how fast their leaf fell to the floor. I had them put their leaf at the top of their head and we counted how many seconds it took to touch the floor. They were very shocked to learn how fast it fell!
Lastly, they had to count how many pennies it took to cover their entire leaf. They are doing a great job at counting!!
We had a lot of fun with this activity. Next week they will have a chance to do it with a little pumpkin!
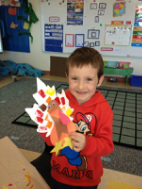
Turkey craft
This is one of my favourite crafts to do all year! We first reviewed some shapes in French and then the children got to make a turkey ( a dindon in French). They then got to sponge paint a leaf with fall colours.
This is one of my favourite crafts to do all year! We first reviewed some shapes in French and then the children got to make a turkey ( a dindon in French). They then got to sponge paint a leaf with fall colours.

Playdough creations
This week the children had the opportunity to show their talent by making playdough turkeys. They were all very creative and turned out amazing!
This week the children had the opportunity to show their talent by making playdough turkeys. They were all very creative and turned out amazing!
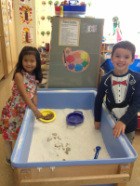
Sept. 30th - Oct. 4th
Digging for acorns
In the sand table this week, I decided to put acorns and rocks. The children had to sort them. As well, I coloured one acorn red and they had to dig to find it.
Digging for acorns
In the sand table this week, I decided to put acorns and rocks. The children had to sort them. As well, I coloured one acorn red and they had to dig to find it.
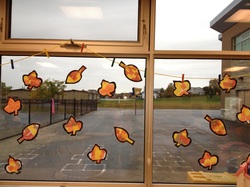
Stained glass leaves
Our craft this week was making stained glass leaves. The children had the choice of picking which fall colour they wanted and were encouraged to make a pattern. They look very nice when the sun is shining.
Our craft this week was making stained glass leaves. The children had the choice of picking which fall colour they wanted and were encouraged to make a pattern. They look very nice when the sun is shining.
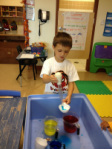
Mixing colours
The water centre was a big hit this week! I had three containers and in each container I put water mixed with food colouring (primary colours). The children had the opportunity to mix the colours. They were very excited to to see which colours they made.
The water centre was a big hit this week! I had three containers and in each container I put water mixed with food colouring (primary colours). The children had the opportunity to mix the colours. They were very excited to to see which colours they made.
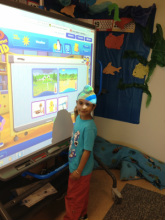
Smartboard
This week at the Smartboard, I found a really fun game where the children had to drag different objects and put them in the right season. Each object had a thermometer. I taugth them that when it was all red that it was really hot outside (summer) and if there was a small amount of red, that it was really cold outside (winter). It was a big hit and they did really well. They are starting to get the hang of how they have to move objects on the smartboard. Bravo!
This week at the Smartboard, I found a really fun game where the children had to drag different objects and put them in the right season. Each object had a thermometer. I taugth them that when it was all red that it was really hot outside (summer) and if there was a small amount of red, that it was really cold outside (winter). It was a big hit and they did really well. They are starting to get the hang of how they have to move objects on the smartboard. Bravo!
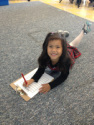
Write the room
This is something new that I'm trying this year. The children are provided a clipboard and pencil. They are responsible for walking around the room and to find words they want to write. It was fun to watch because I found they went to words they knew, liked or that we just learned. They seem to enjoy it very much!
This is something new that I'm trying this year. The children are provided a clipboard and pencil. They are responsible for walking around the room and to find words they want to write. It was fun to watch because I found they went to words they knew, liked or that we just learned. They seem to enjoy it very much!

Probability
This week we discussed probability (the chance that something could happen). Probability is a very hard concept for young children to understand and for the first time they did really well. I provided each student with a dice that had different coloured apples and leaves. Once they rolled they had to colour in a box over that object. The first one to 10 won and they had to stop rolling. It was really fun to watch them. Some children thought that one object would win because it was ahead of the others but then when they rolled some more, it was a different winner. They learned that everyone's sheet was different. They were very excited when doing this activity.
This week we discussed probability (the chance that something could happen). Probability is a very hard concept for young children to understand and for the first time they did really well. I provided each student with a dice that had different coloured apples and leaves. Once they rolled they had to colour in a box over that object. The first one to 10 won and they had to stop rolling. It was really fun to watch them. Some children thought that one object would win because it was ahead of the others but then when they rolled some more, it was a different winner. They learned that everyone's sheet was different. They were very excited when doing this activity.

The 4 seasons
Last week we discussed the four seasons. We watched different videos on the smartboard and read a variety of books. The craft was to decorate the trees according to the season. I provided them with tissue paper and paint. They look really good!
Last week we discussed the four seasons. We watched different videos on the smartboard and read a variety of books. The craft was to decorate the trees according to the season. I provided them with tissue paper and paint. They look really good!
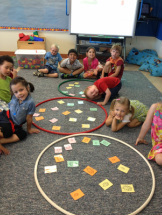
Sorting leaves
For this whole class activity, I put a variety of different leaves on the carpet. I asked the children to look at the leaves and tell me how we could sort them into large hoola hoops. They sorted the leaves according to colour, size and shape. They did extremely well!
For this whole class activity, I put a variety of different leaves on the carpet. I asked the children to look at the leaves and tell me how we could sort them into large hoola hoops. They sorted the leaves according to colour, size and shape. They did extremely well!
APPLES, APPLES, APPLES CONTINUED
This week, we continued to work with apples, Below you will find more activities that we completed.
Letter Identification
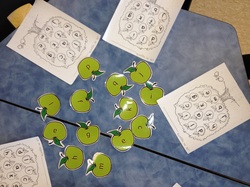
One of our activities this week was to pick an apple and identify the letter. They then had to find it on their apple tree. I had the children tell me the letter in French and then they coloured in the correct apple. If they did not know the letter, I helped them. They did very well. We only focused on letters A to M.
Apple painting
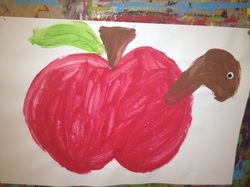
We read a book called Une pomme pour deux (An apple for two). In the story, 2 worms found a very big apple to build their home but they did not know that the other was living in it. Until one day they met and were nose to nose. They started to fight and the apple ended up falling and it rolled down a big hill and hit a rock. Everything in both of their houses was destroyed. After realizing that their house was destroyed they ended up finding a pear tree. They decided that it would be easier to live together. Topics discussed were the importance of sharing and how we could be a good friend. Some children painted a very big apple with a worm living in it.
One to one correspondence
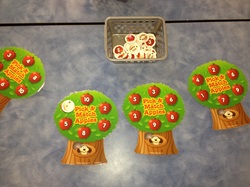
At this centre, the children had to pick an apple and count the number of seeds. They then had to find the number that was the same has the number of seeds.
Apple Addition
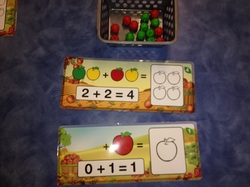
This week, the children were learning addition. We first did some exercises on the carpet using ten frames. The children were given each 10 unifix cubes. I taught them what the + sign means and what the = sign means. We did a variety of questions where the children counted out loud. They really enjoyed it and they did very well. So, I decided to put this activity out. The children had to place the correct number of apple and then count out loud.
Parts of an apple
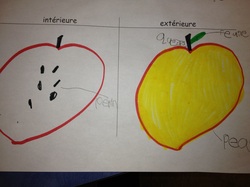
Last week, we learned the parts of an apple. Here they were given an opportunity to draw the inside and outside of an apple. I cut an apple in half, so that they could see the star shape the seeds made. Then they had to label it. Not everyone wanted to draw the apple but a lot liked to observe it.
APPLES, APPLES, APPLES
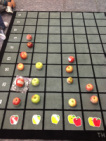
The children were very excited to learn about apples this week. We did so many fun things that it was hard to fit it all in. Thank you parents for sending in apples. Our apple investigation was the most fun! Here are a few things we learned and did:
Apple Graph
When the children first brought in their apple, they got to describe their apple to the class. We learned that apples can be red, green and yellow and some have a mixture of 2 different colours. Then we wanted to know how many of each colour we had in the class, so we first sorted our apples and then we made a graph on the carpet mat. Both classes had more red apples and less yellow apples.
Weighing our apple

The children had an opportunity to weigh their apples using a scale. We wanted to know how heavy our apple was compared to unifix cubes. The children were able to count in French. Some apples were really big that it was hard to fit all of the cubes in the container. They also learned how to balance the scale and know when to stop adding cubes.
Measuring our apple
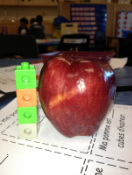
Then the children wanted to know how tall their apple was, so they measured it using unifix cubes. They had to write the number of cubes and draw a picture.We discovered that our apples were not that very tall.
Apple patterning
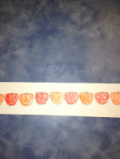
The children learned that a pattern is something that repeats. We see and use patterns everyday. They learned different types of patterns (ABAB, AABB, ABC, AAB, etc.). We first tried to make patterns using many math manipulatives on the carpet. Once we perfected them, they had a chance to make their own apple pattern. Here you see an ABAB pattern.
Pocket chart centre
At this centre, the children were asked to say the sentence and match the apple to the written colour. This is an activity we had practiced first before they did it on their own. Then they had to pick a few colours and write them on their activity sheet.
Writing Centre
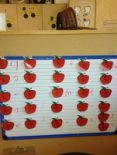
In Senior Kindergarten we begin to learn how to write our lower case letters. The children were asked to write the lower case letter beside their matching upper case letter.
Stamping our apple
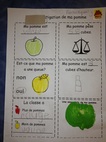
When the children were done investigating their apple, I cut it in half for them and they did their own apple stamp.
LIFE CYCLE OF AN APPLE
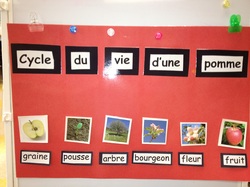
I read a story to the children about how an apple grows. You first need to plant a seed. Then the seed turns into a stem which grows in to a big apple tree. In the spring time, flowers begin to blossom on the apple tree. When the petals fall, the apples begin to sprout. It takes a few months before we can pick the apples. In the fall, the apples are rip enough for us to eat!!! The children were able to put the life cycle in order on their own.
Apple taste testing
The children were given the opportunity to try 3 different types of apples. They tried a McIntosh (red), a Granny Smith (green) and a Golden Delicious (yellow). They then had to decide what apple they liked the best. Both classes ended up liking the McIntosh apples the most.
